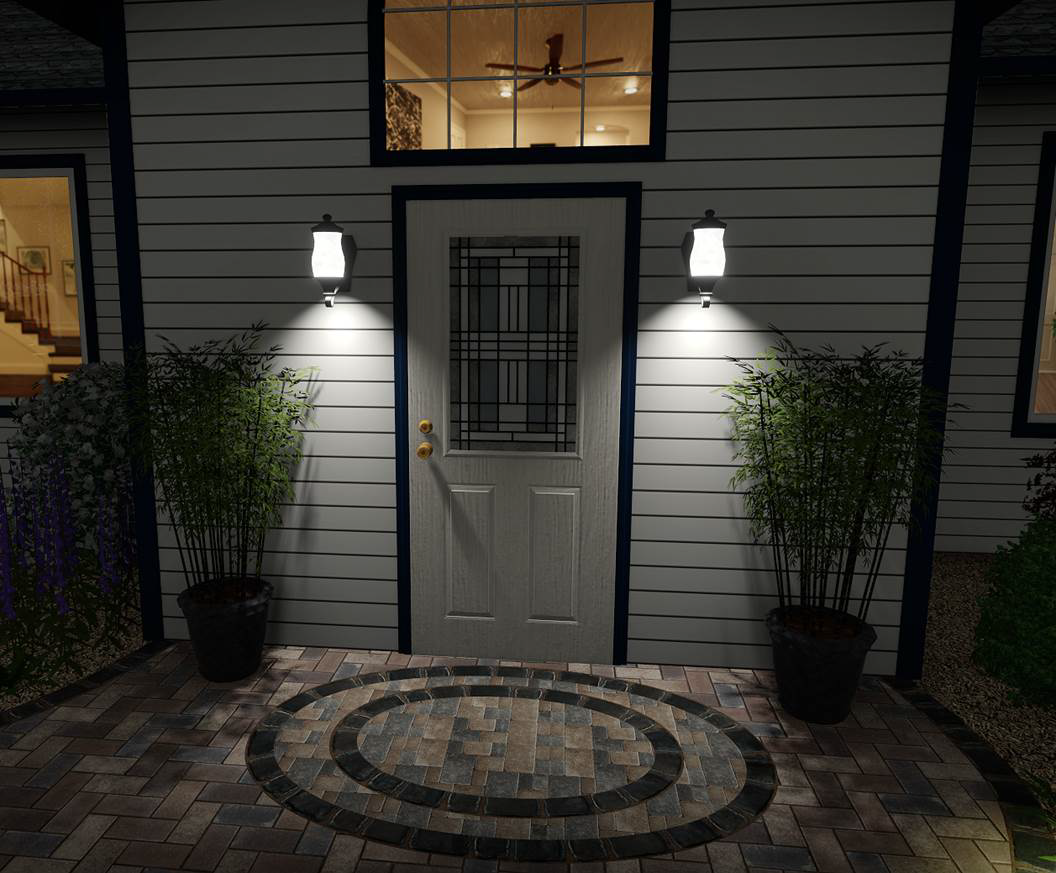
Adding a House Light

Porch and garage lights of many different styles can be added to your house. When viewing your design at sunrise, sunset, and evening, Realtime Landscaping will automatically illuminate any lights you have added.
To add a house light:
- Select the Perspective view (not required but recommended).
- Adjust your view until you can clearly see the wall of the house you want to add the light to.
- From the Building tab, click Add House Light.
- Click the picture of the light that appears to the right of the screen, and then select the light you would like to use from the menu that appears.
- Click the wall you want to add the light to. Press and hold Ctrl while clicking to add more than one.
To move an existing house light:
-
Click the light to select it.
-
Click and drag the light to reposition it.
To move the light to a different House object, drag it onto the wall of the other house. This must be done in the Perspective view, where you can clearly see which wall you’re targeting. (In the Plan view, houses can overlap, so changing which house a light is attached to is disabled.)
To keep the light attached to its current house while dragging, press and hold Ctrl after you start dragging.
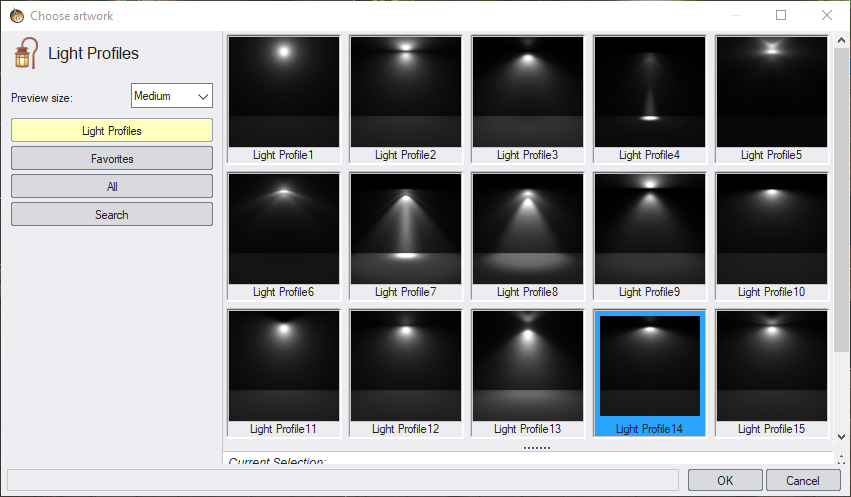
Using IES Light Profiles
IES (Illuminating Engineering Society) profiles describe how light spreads in each direction. Realtime Landscaping includes a selection of profiles that you can use for any light. In Realtime Landscaping Architect, you can also import your own using the IES Light Profile Import Wizard.
Important: In Realtime Landscaping, light profiles are for visualization purposes only. Their pattern and brightness do not directly relate to a given light.
Tips:
- House lights will turn on automatically based on their On time and the current time of day. To set the time of day, see Environment Settings.
- House lights share many of the same properties as landscape lights. For details, see Adding a Landscape Light.
- House lights are specially designed to attach to houses, and can only be placed on house walls. If you want to add a landscape light, see Adding a Landscape Light for information on adding lights that can be placed anywhere.
- House lights can be scaled and stretched to change their shape; for more information, see Scaling Objects and Rotating Objects. Note that changing the size or shape of a light does not affect its brightness.
- When the light is illuminated, the color of the glass is determined exclusively by the light color. Any changes to the glass color using the Edit Materials option will be ignored.