Adding a Realtime Camera

Realtime Cameras are used to create the path the camera follows when creating movies and automatic walkthroughs. Multiple Realtime Cameras can be added to your landscape design; simply choose which one you want to use when starting a walkthrough or creating a movie.
To add a Realtime Camera:
- From the Utilities tab, click Add Realtime Camera.
- Draw the path that you want the camera to follow by clicking the left mouse button to add points. Press the Backspace key to remove the last point added, or press the Esc key to cancel.
- To finish drawing the Realtime Camera path, right-click to place the last point or left-click the first point (depending on whether you want an open or closed path).
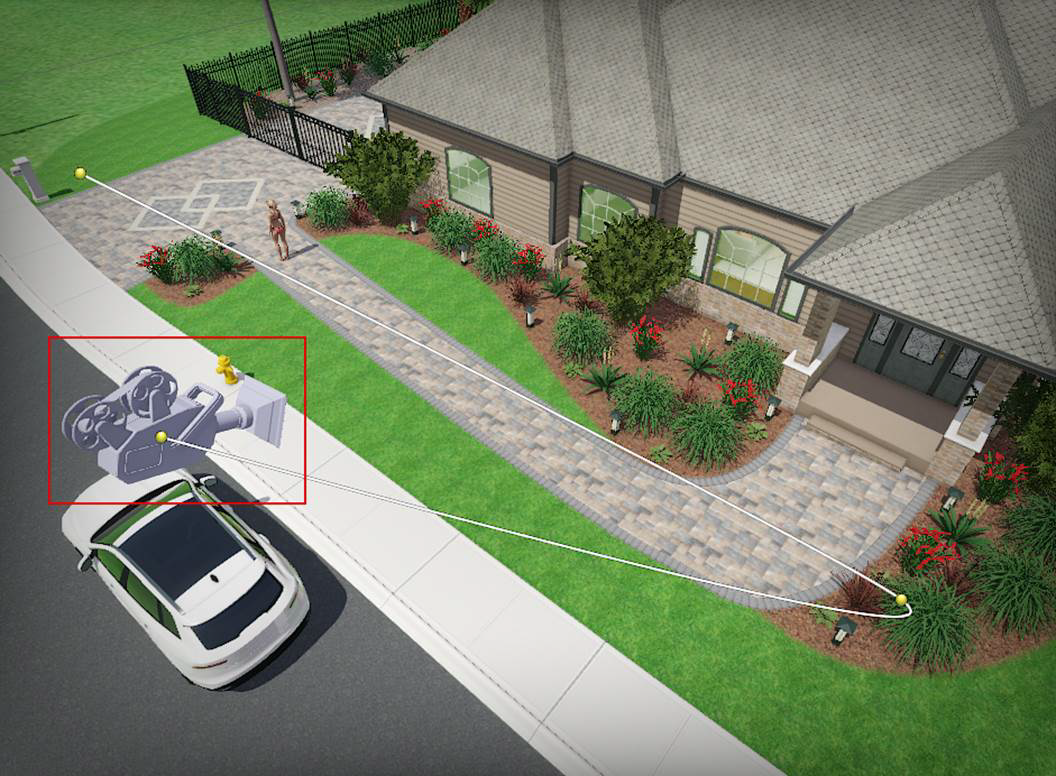
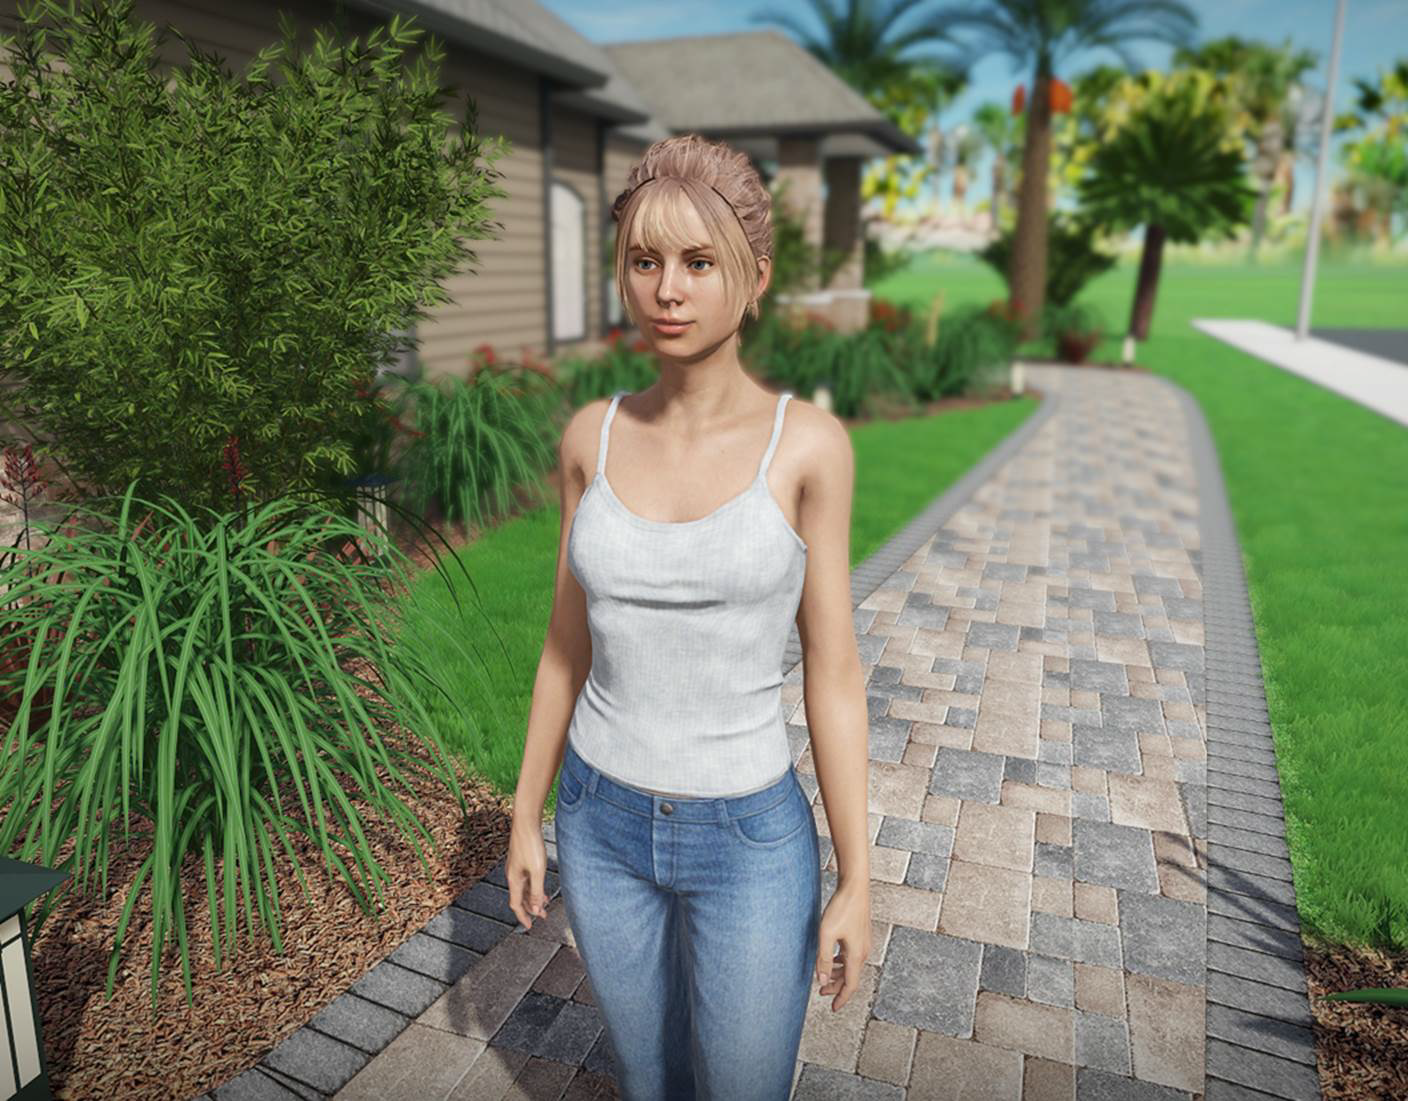
In the picture below, a Realtime Camera is used for a walkthrough of the front yard.
Adjusting the Camera
Once you have added a Realtime Camera, you can adjust its path to focus on the most important parts of your design. You can do this easily by adjusting the view of the camera at each point. If you need more control over a certain section of the path, you can simply add more points.
To adjust the camera viewpoints:
- Click the Realtime Camera to select it.
- Click Edit Points.
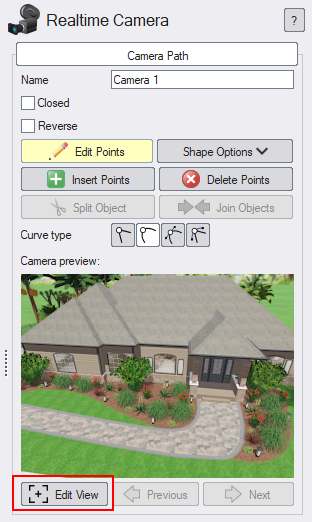
- Click any point along the camera path to select it. Then click the Edit View button, shown below. Note: The Edit View button will only be available when one (and only one) point is selected.
- The current camera viewpoint will appear in the Perspective view. You can then adjust the viewpoint as you normally would. See Adjusting the View for details.
- Click Next and Previous to move between points on the path.

- Repeat the above steps for each point that you want to adjust.
Note: For more control over the camera path, you can add additional points as needed. Then repeat the above steps to set the viewpoint at each one.
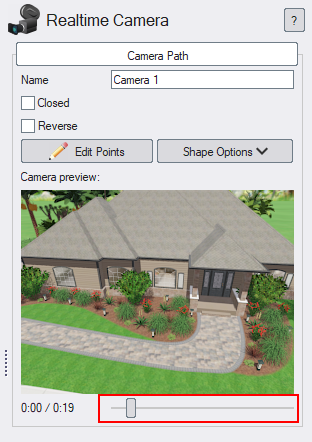
To preview the camera path:
-
Click the Realtime Camera to select it.
-
Drag the slider shown below.
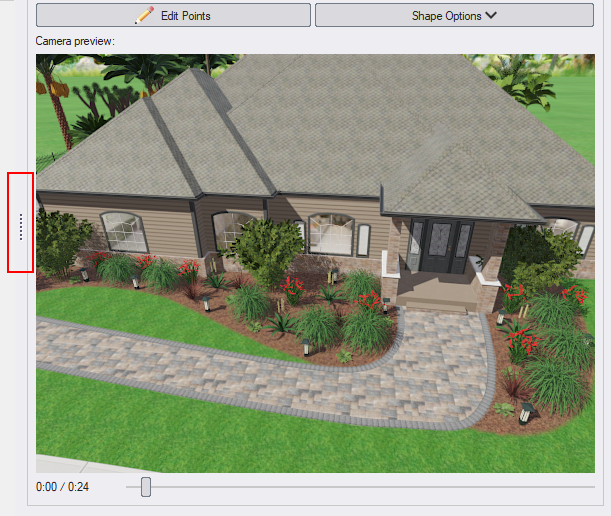
Tip: You can increase the size of the camera preview by dragging the left edge of the property window to expand it.
To use a Realtime Camera during a Realtime Walkthrough:
- Click the Walkthrough tab that is located at the lower-left of the screen. The dialog below will appear.
- Click the Realtime Camera (view moves automatically ) option, and then select the camera you want to use from the drop-down menu.
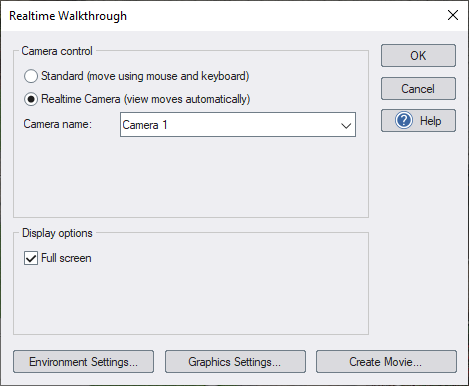
- Click OK to begin the Realtime Walkthrough.
- When you are finished viewing the walkthrough, press Esc.
Using Depth of Field
The depth of field option draws your focus by blurring parts of the scene that are nearer or farther than the focus distance. You can enable depth of field at any point.
Changing the Time of Day
Using the Time of day option, you can cause the time of day to change during the walkthrough. The shadows, lighting, sun/moon position, and sky will all be affected. When transitioning from day to night, landscape and other lighting in your design will automatically illuminate.
The transition normally occurs smoothly over a few seconds. However, if you want the transition to occur immediately, set the previous point's Transition to next point option to Cut.
Adding Transitions
Normally the camera moves smoothly from one point to the next. If you want the camera to transition directly to the next point, use the Transition to next property and specify how you want the transition to occur. For an immediate transition, choose Cut. For a smoother transition, you can choose from a wide variety of effects, including fade, wipe, dissolve, and more.
Adding Text
You can add text at each point in your walkthrough. This is especially useful when creating presentations that call out features in your landscape design, display contact and other information about your company, and so forth.
To add text:
- Click the Realtime Camera to select it.
- Click Edit Points.
- Select the point where you want the text to appear.
- Click Add text to enable text at that point.
- Click the ... button underneath the Add text option and enter the desired text.
- Set the font, style, position, and other options as desired.
During a Realtime Walkthrough, the text will appear when the camera reaches the specified point and will remain until the next point is reached. If you want the text to remain visible through multiple points, first select all of the desired points and then set the above properties at once.
Icons in the Plan View
The following icons appear in the Plan view to help visualize the actions you have set for the camera along each segment of the path.
| Symbol | |
|---|---|
 |
A green arrow will appear where the camera will smoothly transition from one point to the next without cutting or holding. |
 |
An orange arrow will appear where the camera will hold (pause) for a period of time. The orange arrow will appear between the previous point and the point at which the pause will occur. |
 |
A scissors icon will appear where the camera will transition from one point to the next. The scissors icon will be placed between the previous point and the point that the camera will transition to. |
Tips:
- Hold time can be used to temporarily stop the camera at that point for a specified time.
- Camera speed can be used to control the speed of the camera as it passes through the selected point. The speed is shown as feet or meters per second, but you can also enter mph or kph if desired. For example, 25 mph or 40 kph.
- Multiple Realtime Cameras can be added to your landscape design. You can choose which of the cameras you would like to use when creating movies or entering a Realtime Walkthrough.
- In Realtime Landscaping Architect, your company logo can be automatically added to walkthroughs, screen shots, and movies. For details, see Company Logo Settings.