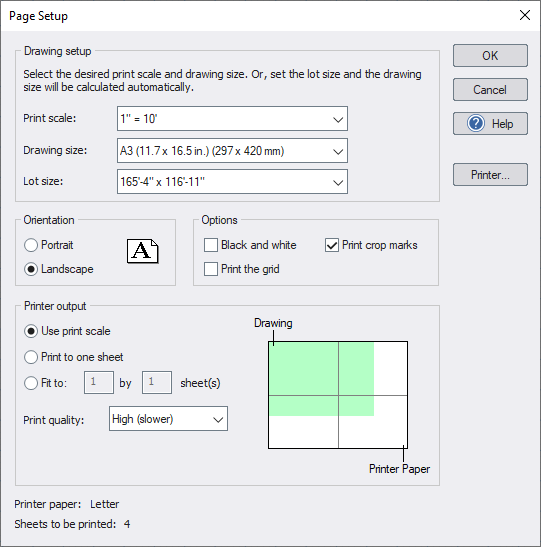
Page Setup
Use the Page Setup dialog to set the drawing size, print scale, and lot size of your landscape design.
To edit the page settings:
- From the File menu, click Page Setup.
- Modify the settings as needed and then click OK.
Note: These settings are only used by the Print Plan command, not the Print Viewport or Export Viewport to File commands.
Print scale
How your landscape design will be scaled when printing the Plan view. For example, if the print scale is set to 1” = 10', then when printing the Plan view with the Use print scale option enabled, your design will be sized so that 10 feet in the design appears as one inch on paper.
Drawing size
How large your landscape is in terms of paper size. If the drawing size is larger than a single sheet of paper, then multiple sheets of paper can be printed. Crop marks will be printed where the separate pieces of paper should be joined together.
Lot size
How large your landscape is in terms of feet or meters. You can choose a predefined lot size or set your own. The length and width of the lot size can extend to 3000 feet (914 meters), which is about 206 acres. Larger designs tend to require more memory and computer power, so we recommend using the smallest lot size that will fit your landscape design.
Orientation
Determines whether your design is laid out in portrait or landscape orientation.
Black and white
Print in shades of gray instead of in full color.
Print crop marks
Add crop marks to each piece of paper to designate where the papers should be joined together. Crop marks are only added if multiple sheets of paper are needed to print the design.
Print the grid
Add the grid when printing. To modify the grid size and color, see Snap Settings.
Use print scale
Use the print scale to determine how the design scales from virtual units to paper, and therefore how many pages will be printed.
Print to one sheet
Print the entire design to a single piece of paper, ignoring the print scale.
Fit to x by y sheets
Ignore the print scale and size the design to fit the specified number of sheets of paper.
Print quality
Determines the clarity of the printout. Low or Medium can be used for draft prints (which are faster to render), but High should be used for the best quality.
Print preview
Shows how the drawing will be sized on the paper based on the current settings.