Adding a Region

A region is an enclosed area that is filled with a material such as grass, dirt, mulch, paving stone, wood, rock, or brick. Regions can be used for driveways, play areas, ground cover, and more. They can be mounded or flat, and their edges can be curved or sharp. Multiple regions can overlap seamlessly. Regions can be created in any shape and size, and can be given any one of hundreds of materials.
To add a region:
- From the Landscape tab, click Add Region.
- Draw the outline of the region by clicking the left mouse button to add points. Press the Backspace key to remove the last point added, and press the Esc key to cancel. If you would like to input the distance and angle manually, place at least one point and then press Enter.
- To finish drawing the region, place the last point on top of the first point. Or, right-click to place the last point.
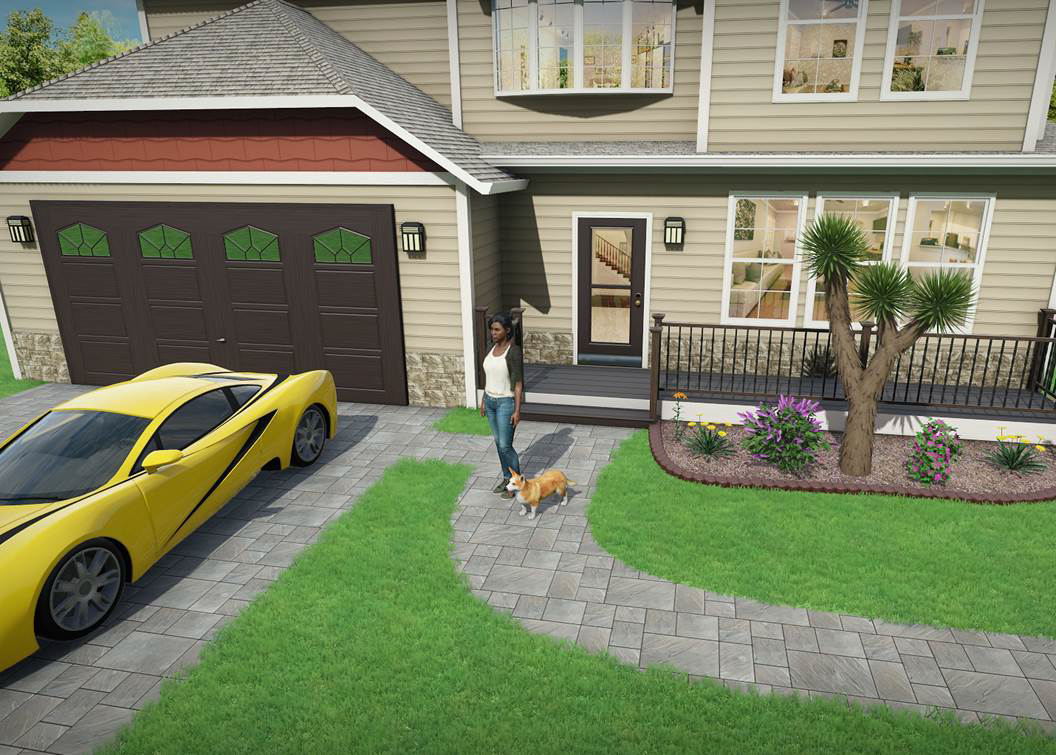
In the picture below, regions were used for the lawn, planting bed, sidewalk, and driveway.
Changing the Shape
A region's shape can be easily modified after it has been added to your landscape design. To change the shape of a region, select the region and click the Edit Points button. See Editing Points for more information.
Setting Region Height
Regions can be a great way of easily adding subtle changes to the topography of a landscape design. By adjusting a region's height, the region can be mounded or depressed to create a berm or a pit.
Use the Height taper property to adjust how steep the transition is from the apex of the mound or depression to the surrounding terrain. By setting this property to 100, you can create raised or lowered regions with vertical edges.
For more fundamental changes, see Sculpting the Terrain.
To add a mound or depression:
- Click an existing Region to select it.
- Adjust the Height property as needed. A positive height will create a mound, while a negative height will produce a depression.
- Adjust the Height taper property as needed. Use a lower value for a more rounded edge, or a larger value for a sharper edge. Use 100 for a vertical edge.
See Sculpting the Terrain for more information on changing the topology of your landscape design.
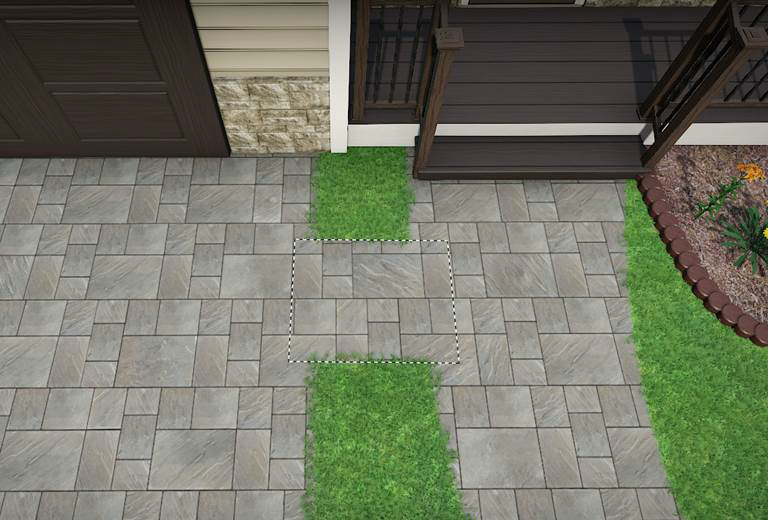
Working with Overlapping Regions
Regions can be seamlessly overlapped to create the desired shape more easily. In the picture below, the driveway on the left was joined to the walkway on the right using a small square region with the same material.
Controlling the Render Order
When two regions that have different materials overlap, one region will appear on top of the other in the overlapping areas. Using the Render Order options, you can control which region will appear on top of the other. For example, if a path runs through a grassy region, you could use the Render Order options to ensure that the path is on top of the grassy area and not under it.
The render order of the following objects can be adjusted:
Note (Architect): When working in Architect's Plan view, Plan Detail objects will always appear on top of the 3D landscape. See Adding Plan Detail for more information.
To change a region's render order:
- Select an existing Region that you want to adjust.
- If you want the selected region to show on top of overlapping objects, click Edit , Render Order , and Bring to Front. If you want the selected region to appear under overlapping objects, then click Edit , Render Order , and Send to Back.
If you want to bring the selected region just one step toward the top of a group of overlapping objects, click Edit , Render Order , and Bring Forward. If you want to send the region just one step toward the bottom of a group of objects, click Edit , Render Order , and Send Backward.
Note: The render order of multiple regions can be changed at the same time using the steps above. For example, you can select multiple regions by clicking Edit , Render Order , and Bring to Front to cause each selected region to appear on top of any overlapping objects.
Adding a Border
A border can be added around the region, either to specific edges or the entire shape.
To add a border:
- Select the Region that you want to change.
- Click Add border.
- Set the Inset and Width properties as desired.
To toggle the border on or off per edge:
- Select the Region that you want to change.
- Click the Edit Border button to enter border editing mode.
- Click each edge where you want to toggle the border on or off.
- Click the Edit Border button again to leave border editing mode.
Note: The corner type of the region border can be adjusted at each point. See Changing Corner Types for details.
Customizing the Plan View
Applies to:  Plus Pro
  Architect
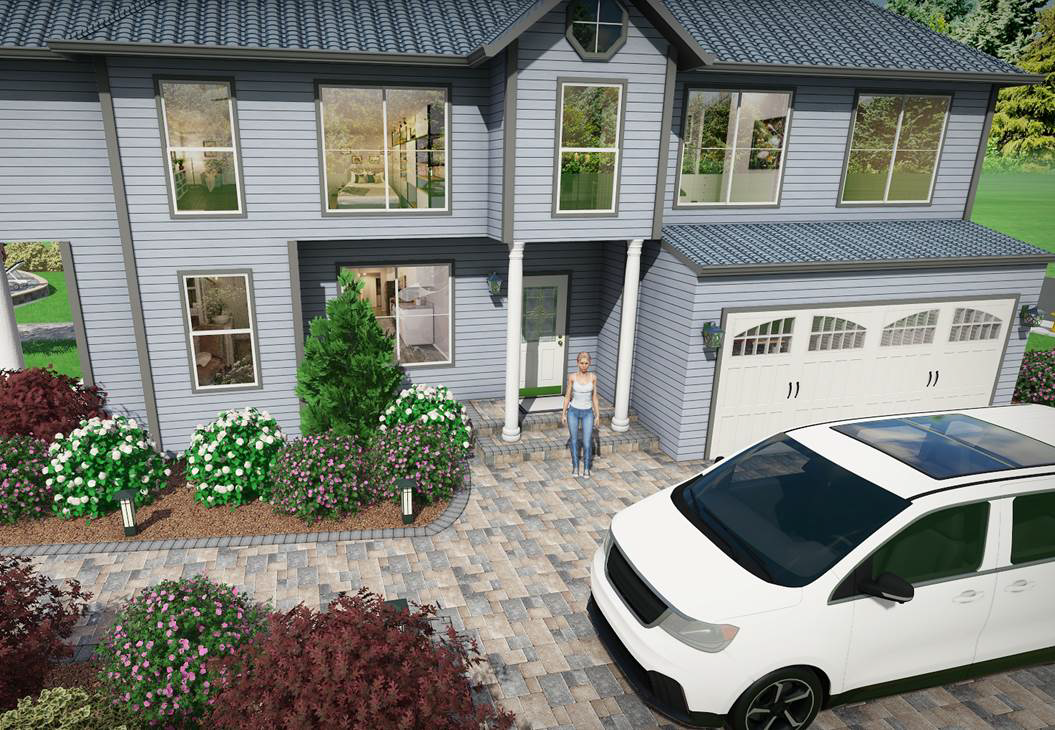
Regions can appear one way in the Perspective view, and another way in the Plan view. This is useful for when you want your Perspective view to look realistic, but your Plan view to appear stylized, such as the one shown below. To do this, click the Custom appearance in each view checkbox and customize the Plan material as desired.
The Plan view in the picture below uses brown colored pencil to represent the mulch regions, and gray marker to represent the driveway and pathway regions.
Below is the same design in the Perspective view.
Tips:
- Regions can be added in either the Plan or Perspective view, but are easiest to add in the Plan view.
- When building geometric shapes, such as those used when creating driveways and patios, it is usually best to ensure that grid snap is enabled. See Snap Settings for details.
- Points can be easily added to your region to increase your control over its shape. For more information, see Inserting and Deleting Points.