Adding a Swimming Pool
Applies to:  Plus
Plus  Pro Architect

Using Realtime Landscaping Pro and Architect, you can design a wide variety of above and below ground swimming pools and spas. Water features such as waterfalls, fountains, and jumping jets can be seamlessly integrated with your swimming pool design. Swimming pools can be designed from the ground up, or you can use the wizard to add a pre-built pool for use as a starting point.
Spas may be added in or around a swimming pool, attached to the pool, or added as a standalone object. Like pools, spas may be above or below ground, and can be given spillways to flow into swimming pools or other spas. The Swimming Pool object is used to create both swimming pools and spas.
Pool decking can be added to provide a flat foundation for swimming pools and spas, and to extend the poolside area. Diving boards, waterslides, and more can be added to the pool decking to enhance your swimming pool design.
To add a swimming pool or spa:
- From the Swimming Pool tab, click Add Swimming Pool.
- Draw the outline of the swimming pool by clicking the left mouse button to add points. Press the Backspace key to remove the last point added, and press the Esc key to cancel. If you would like to input the distance and angle manually, place at least one point and then press Enter.
- To finish drawing the pool, place the last point on top of the first point. Or, right-click to place the last point.
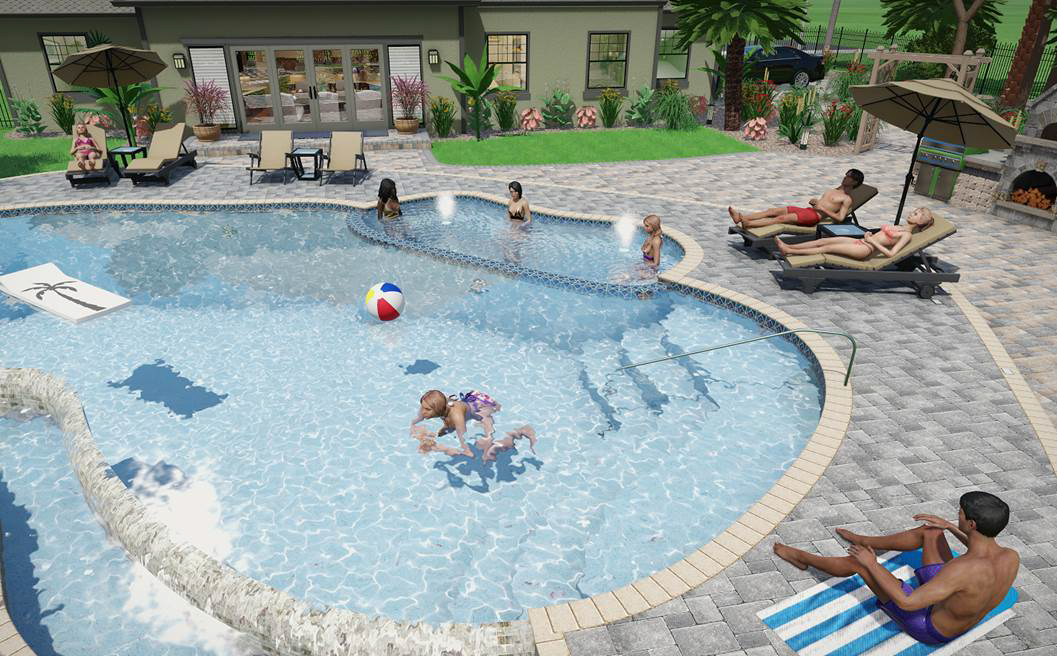
A combined swimming pool and spa are shown below.
Editing Coping
Swimming pools and spas both support realistic coping. Coping is added to every swimming pool and spa by default, but can be turned off per edge or disabled entirely.
To turn the coping on or off per edge:
- Select the pool you want to edit.
- Click Edit coping to enable edit coping mode.
- Click the edges where you want to toggle the coping.
- When finished, click Edit Coping again to disable edit coping mode.
Coping Styles
Many different coping materials are available, and each can use one of the following styles.
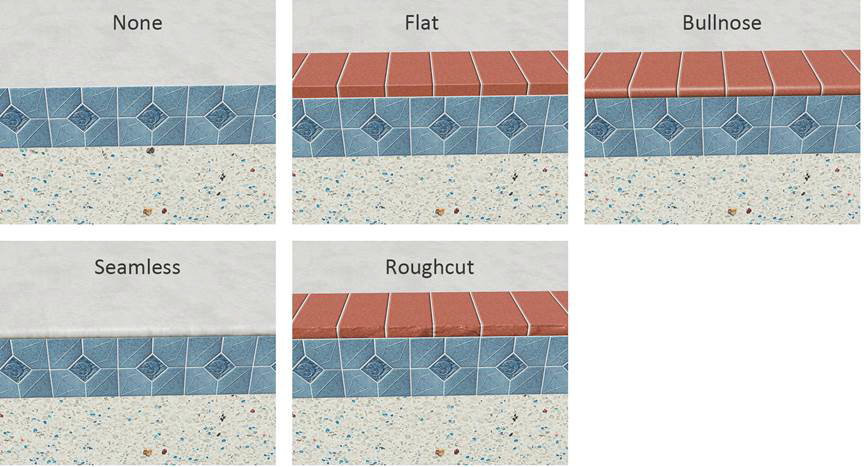
- None: Disables coping. Creates a sharp edge between the pool decking and pool wall.
- Flat: Creates coping with a flat edge.
- Bullnose: Creates coping with a rounded edge. Bullnose is the default style.
- Seamless: Creates a seamless, rounded transition between the pool decking and pool wall.
- Roughcut: Similar to Flat, but with a rough edge.
Infinity Edges and Glass Walls
Applies to: Plus Pro Architect
Infinity edges, also called "invisible edges" or "negative edges," are areas in which the water freely flows over the pool wall into a basin, spa, or another pool. Infinity edges can add a dramatic and visually appealing effect to your pool designs.
You can also create glass pool walls using the same tool. Two types of glass walls are supported, normal (which blocks the water) and infinity (which allows water to flow over it).
To create infinity edges and/or glass walls:
- Select an existing swimming pool.
- If needed, insert points surrounding the sections where you want the infinity edges to appear.
- Click the edge you would like to transform into an infinity edge or glass wall. Click the same edge multiple times to cycle through the available types. Repeat for each edge where you want an infinity edge or glass wall to appear.
- Click Edit Edges again when finished.
Infinity Edge and Glass Wall Styles
The following edge styles are available:
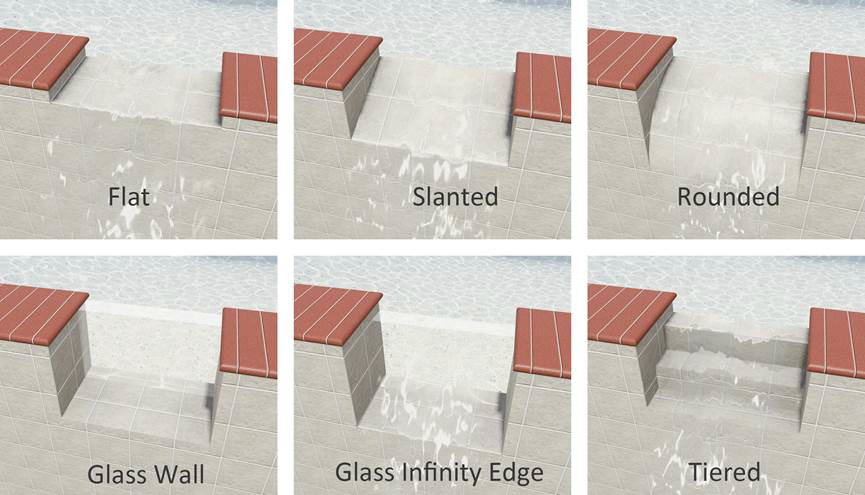
For the Glass Wall style, use Glass height and Glass thickness to set the height and thickness of the glass. These values apply to all glass walls in the pool.
For the Slanted style, use Edge angle to control the slope of a negative edge. Positive angles slope downward toward the outside of the wall, while negative angles reverse the direction so the edge slopes downward toward the inside of the pool.
For the Flat style, use Number of tiers to specify how many tiers are created on a flat negative edge. The width of the negative edge is determined by the pool wall thickness, and the tiers are sized equally to fit within that width.
Creating Spas and Hot Tubs
Spas and hot tubs are also created using the Swimming Pool object, and can be designed in any shape and size needed. Hot tubs can be added inside or outside swimming pools, and can even intersect swimming pools if needed.
To create a spa:
- From the Swimming Pool tab, click Add Swimming Pool.
- Draw the outline of the spa by clicking the left mouse button to add points. Press the Backspace key to remove the last point added, and press the Esc key to cancel. If you would like to input the distance and angle manually, place at least one point and then press Enter.
- To finish drawing the spa, place the last point on top of the first point. Or, right-click to place the last point.
- If needed, move the spa into position; it can be placed anywhere in your landscape design. For details, see Moving Objects.
- Optionally set Water effect to the desired effect, such as rippling water and steam.
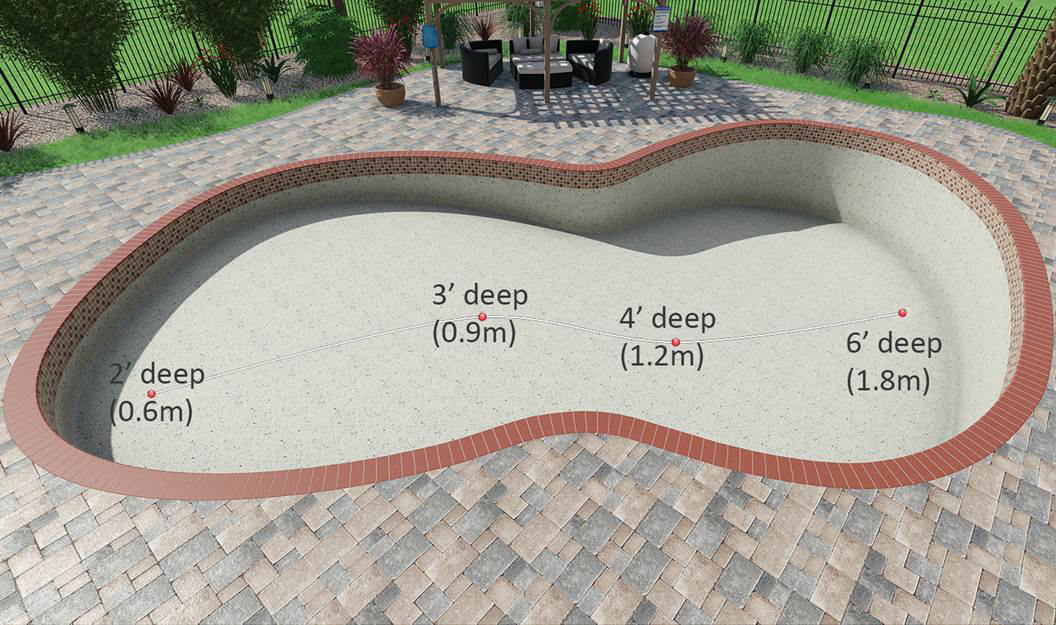
Setting Depths
Swimming pools can be set to either a single depth or to multiple depths along a path called the depth line.
To set the depth for the entire swimming pool:
- Click the swimming pool or spa you want to modify in order to select it.
- Adjust the Depth property as needed. See Property Types for details.
To set the depth at different points:
- Click the swimming pool or spa you want to modify in order to select it.
- Click Edit Depth to enable depth editing mode.
- Click the point you want to change in order to select it.
- Set Depth to raise or lower the water depth at the selected point.
- When finished, click Edit Depth again to disable depth editing mode.
Note: When looking at the depth line from above, it should be a straight line. Additional points can be added and each point can have a different elevation. However, any lateral changes in the line will be ignored. The depth will only change in a straight line from the beginning to the end of the depth line.
The picture below illustrates a swimming pool design with variable depths.
Floor Radius
Applies to: Plus Pro Architect
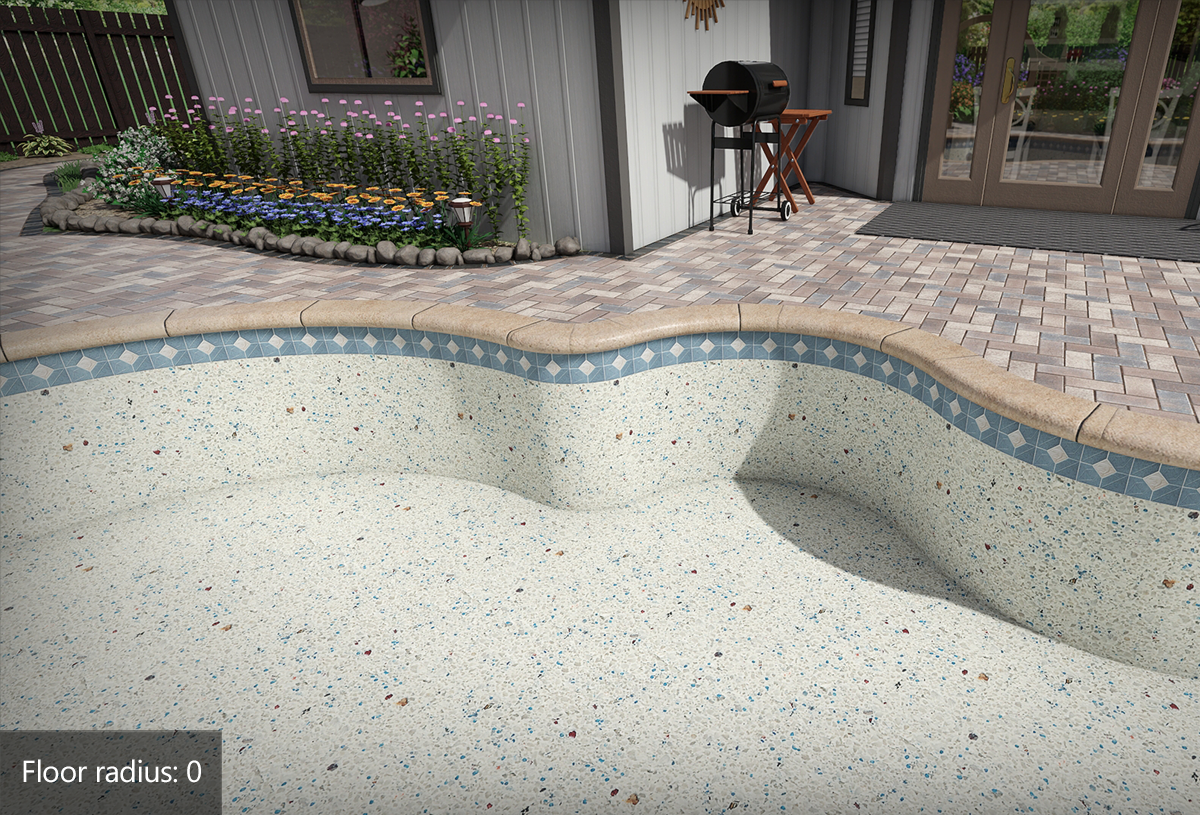
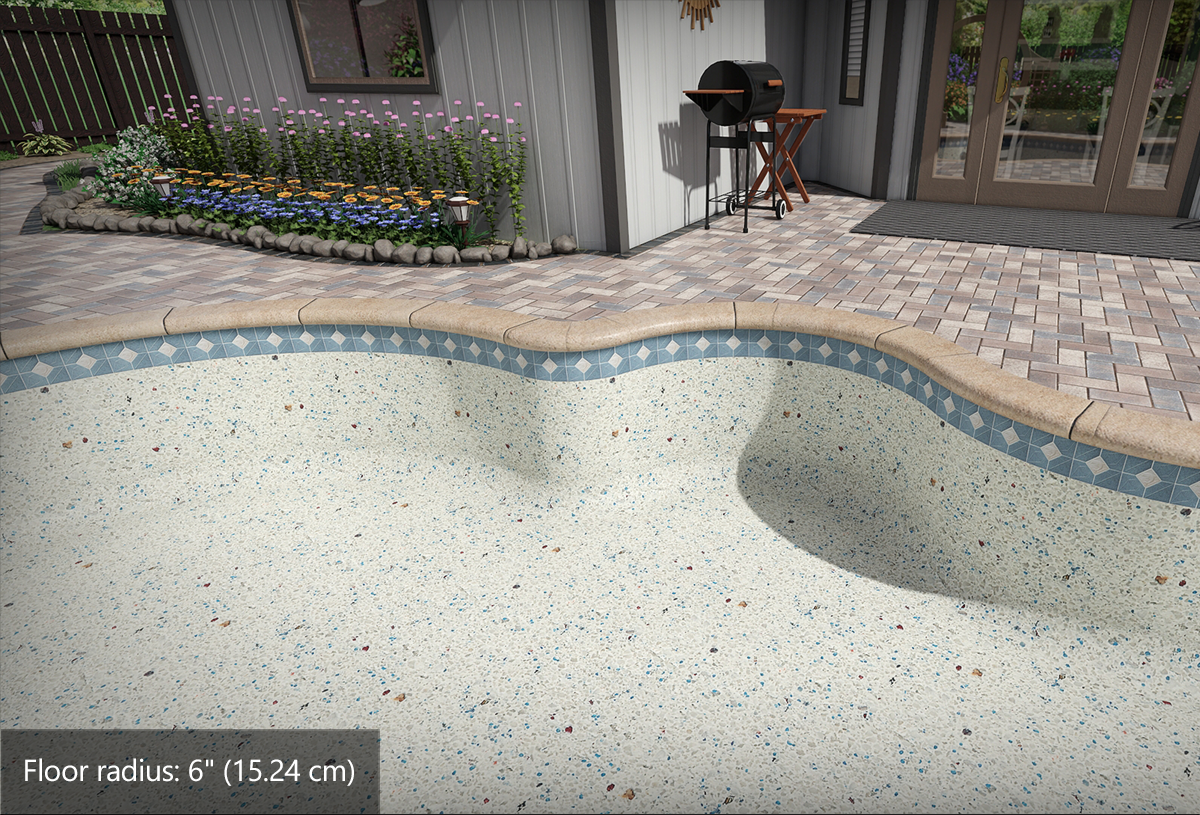
Use Floor radius to create a rounded edge where the inside pool wall meets the pool floor. This can produce a softer, more realistic transition between the wall and floor surfaces.
Set Floor radius to 0 to disable the rounded edge.
Customizing the Plan View
Applies to: Plus Pro Architect
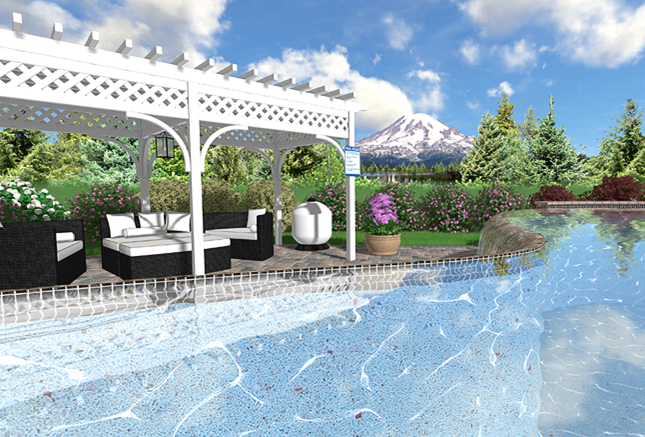
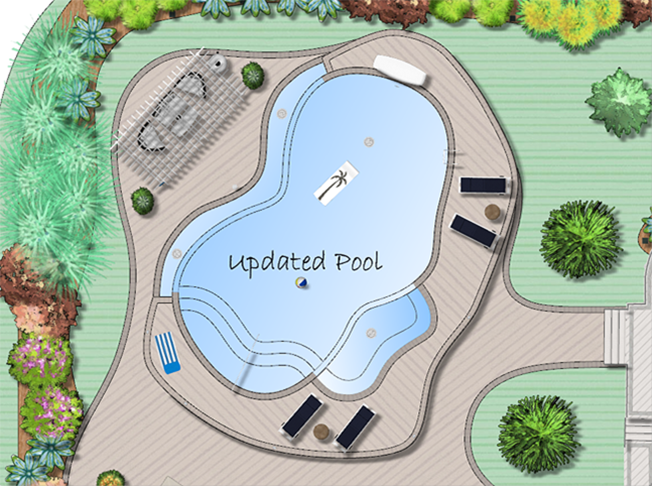
Swimming pools and spas support a customized appearance in each view. For example, the swimming pool could be modified to look stylized in the Plan view (as shown below), and realistic in the Perspective view. To do this, click Custom appearance in each view and customize the Plan view as desired.
Below is the Plan view of a swimming pool design. Colored marker materials and gradient fills were used for a stylized appearance.
Tips:
-
Important: Swimming pools can represent a safety hazard if proper care is not taken. Please check your local building codes and recommended safety standards before constructing a swimming pool or spa.
-
For details on adding water features to your swimming pool design, see Adding a Waterfall and Adding a Fountain.
-
To add a pre-built swimming pool design to your landscape, see Swimming Pool Wizard.
-
The shapes of your swimming pools and spas can be easily customized by moving, adding, and deleting the points that compose a pool or a spa's shape. For details, see Editing Points.
See also:
- Swimming Pool Properties
- Swimming Pool Wizard
- Setting Object Properties
- Selecting Objects
- Selecting Points
- Editing Objects
- Adding Pool Decking
- Adding Pool Stairs
- Adding a Pool Seat
- Adding a Pool Wall
- Adding a Pool Light
- Adding a Pool Accessory
- Adding a Fountain
- Adding a Waterfall
- Realtime Walkthrough
- Saving and Loading Shapes