Adding a Rounded Rectangle
Applies to:  Plus Pro
  Architect

To add a rectangle with rounded corners to the Plan view:
- Click the Plan tab to switch to the Plan view.
- From the Plan Detail tab, click Add Rounded Rectangle.
- Set Radius to the desired radius.
- Click to place the first corner of the rounded rectangle.
- Optional : Hold Shift to constrain the shape to a square.
- Click to place the opposite corner of the rounded rectangle. If you would like to input the distance and angle manually, place the starting point and then press Enter.
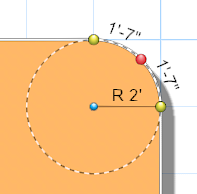
- Move your mouse to adjust the radius of the rectangle's corners and click the left mouse button when the desired radius is shown. It is usually best to turn off grid-snap for this step.
To change the radius of a rounded rectangle after you create it:
-
Select the rounded rectangle.
-
Click Edit Points and Round Corners.
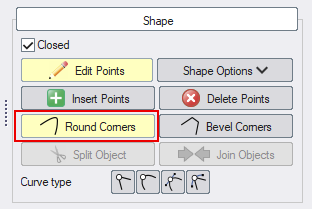
- Drag the blue dot to change the radius of the corners one at a time. Or, select the corners you want to change and press Enter to set the radius manually.
- When finished, click Edit Points again to exit point editing mode.
Tips:
- The shape of the rounded rectangle will be filled by default. To show just the rectangle's outline, set Transparency to 100.
- For details about the Round Corners tool, see Rounding Corners.
- All plan detail objects can only be added and viewed in the Plan view, unlike other objects that are compatible with all views. See Adding Plan Detail for more information.