Adding a Pie Shape
Applies to:  Plus Pro
  Architect

To add a pie shape to the Plan view:
- Click the Plan tab to switch to the Plan view.
- From the Plan Detail tab, click Add Pie.
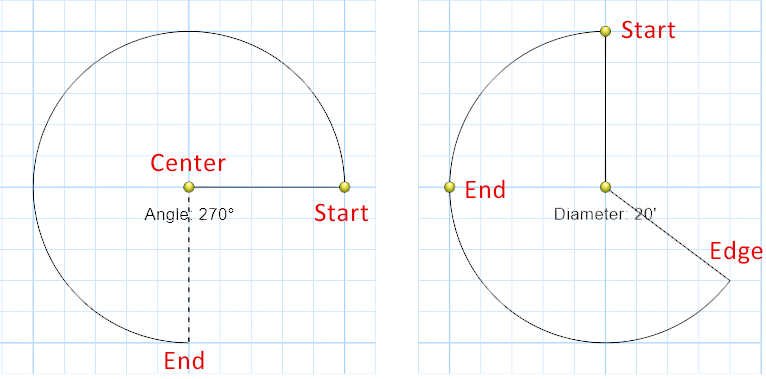
- Click the desired creation method shown below.
- Click to place the points of the pie depending on the creation method.
Tips:
- The steps above are only used when first adding the pie shape. Once the pie is added to your design, it can be edited as needed. See Editing Points for more information.
- The shape of the pie will be filled by default. To show just the pie's outline, set Transparency to 100.
- All plan detail objects can only be added and viewed in the Plan view, unlike other objects that are compatible with all views. See Adding Plan Detail for more information.