Adding a Radial Dimension
Applies to:  Plus Pro
  Architect

The Radial Dimension object is used to annotate a radius in the Plan view of your landscape design. Radial dimensions will not appear in the Perspective view.
To add a radial dimension to the Plan view:
- Click the Plan tab to switch to the Plan view.
- From the Plan Detail tab, click Add Radial Dimension.
- Click the outer edge of the radius you want to annotate.
- Click the center point of the radius. This step is skipped if you are measuring an existing shape that has a true radius.
- Click to set the radius position.
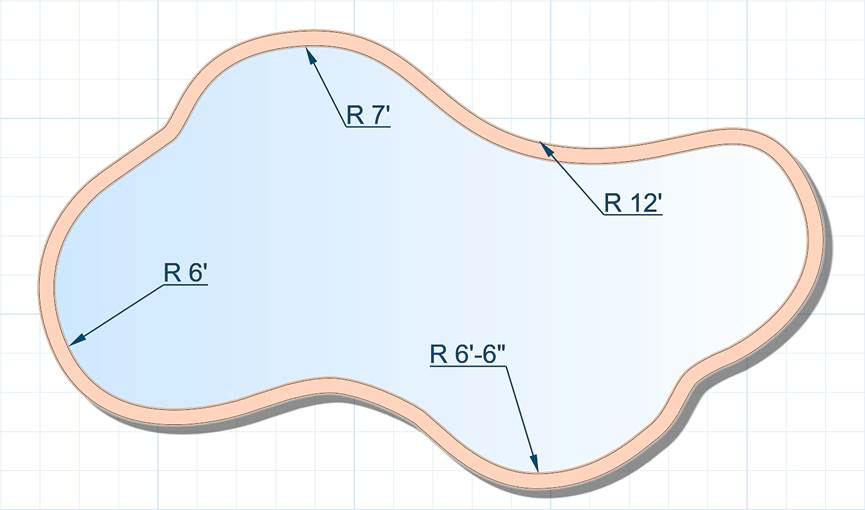
In the picture below, a pool plan uses radial dimensions to illustrate its layout.
Tips:
- Once the radial dimension is added to your design, it can be edited as needed. See Editing Points for more information.
- All plan detail objects can only be added and viewed in the Plan view, unlike other objects that are compatible with all views. See Adding Plan Detail for more information.