Adding a Path

The Path object is a very versatile tool that can be used for landscape paths and walkways. Paths can be curved or straight and created in any shape and size. Paths can overlap Region objects, allowing you to mix regions and paths as needed.
To add a path:
- Click the Add Path button found near the top of the screen under the Landscape tab.
- Modify the Width property to set the path's width.
- Draw the path by clicking the left mouse button to add points. Press the Backspace key to remove the last point added, and press the Esc key to cancel. If you would like to input the distance and angle manually, place at least one point and then press Enter.
- To finish drawing the path, right-click to place the last point.
Once a path is added, click Edit Points to edit its shape. Points can then be moved, added, and deleted as needed for your landscape design.
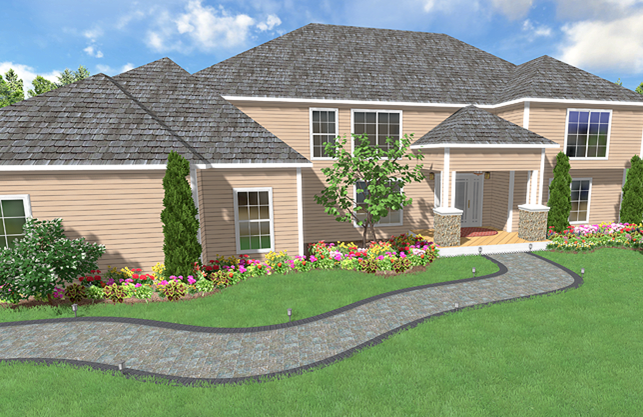
In the picture below, the Path object was used to create the curved walkway.
Adding a Border
A border can be added around the path, either to specific edges or the entire shape.
To add a border:
- Select the path that you want to change.
- Click Add border.
- Set the Inset and Width properties as desired.
To toggle the border on or off per edge:
- Select the path that you want to change.
- Click the Edit Border button to enter border editing mode.
- Click each edge where you want to toggle the border on or off.
- Click the Edit Border button again to leave border editing mode.
Note: The corner type of the path border can be adjusted at each point. See Changing Corner Types for details.
Setting a Custom Material Direction
Once the custom material direction is enabled, you can click Edit Direction to change the path that material follows.
To set a custom material direction:
- Select the Path that you want to edit.
- Click the Enable custom material direction checkbox.
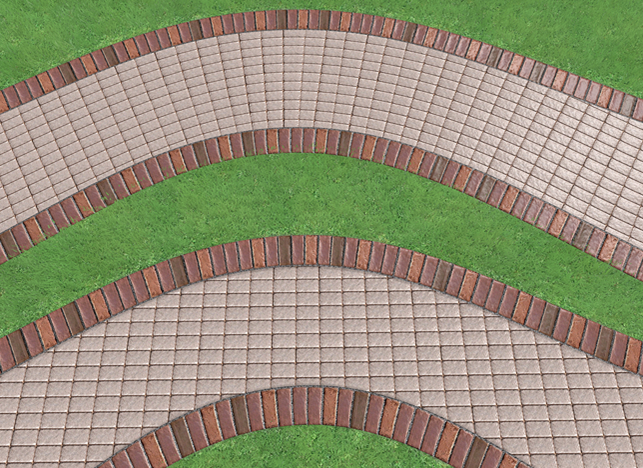
In the picture below, the upper path is shown with a custom material direction, and the lower path is shown without one.
Controlling the Render Order
When multiple overlapping regions and paths of different materials exist in your design, you can determine which objects will show on top of the others. See Adding a Region for more information.
Customizing the Plan View (Architect)
Like regions, paths can be given a customized appearance in the Plan view. See Adding a Region for details and examples.