Adding an Overlay

An Overlay object is a picture that is draped over the terrain. For example, you could import a blueprint of a house and trace over the exterior using the House tool. This can help you design more quickly and with a greater degree of accuracy.
To add an overlay:
- Import the picture you want to use as an overlay using the Picture Import Wizard.
- From the Utilities tab, click Add Overlay.
- Click the picture of the default overlay that appears to the right of the screen, and then select the overlay that you recently imported from the menu that appears.
- Click to place the overlay.
- Position and resize the overlay as needed. To size the overlay accurately, click Resize using Known Distance.
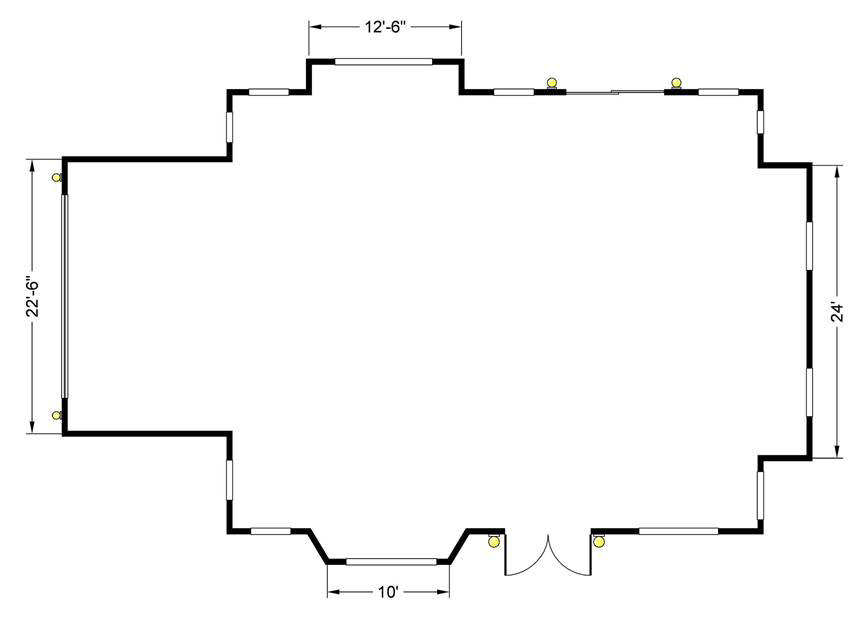
Below is an example of a simple floor plan that was added using the overlay object.
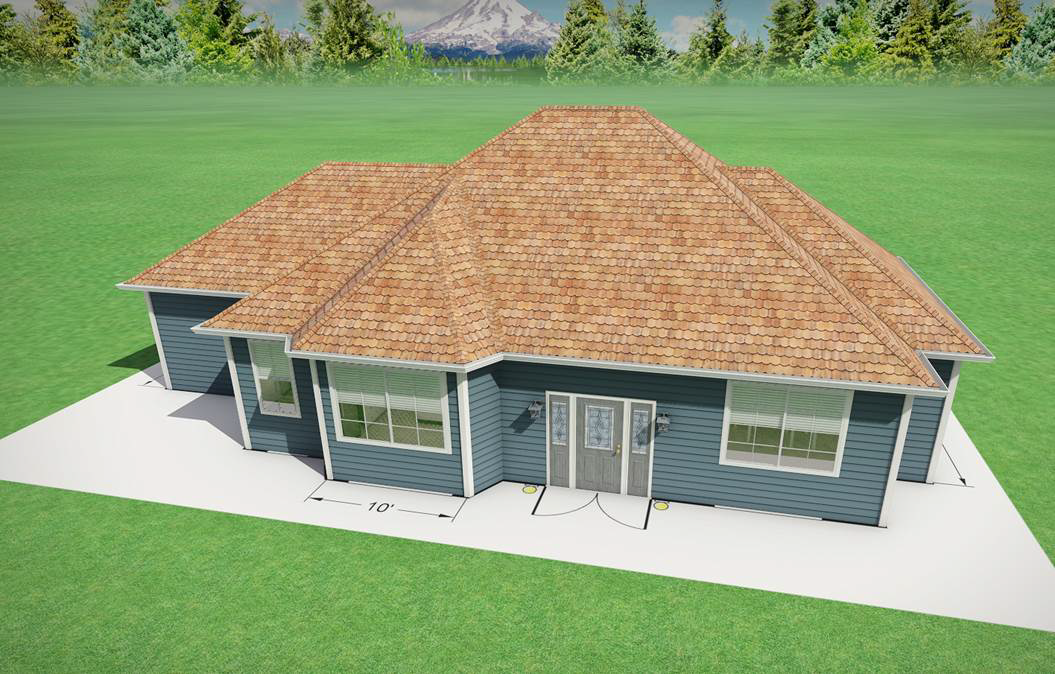
In the design below, a house has been created using the overlay as a template.
Tips:
- In Realtime Landscaping Architect, you can also import overlays in DWG, DXF, and PDF format using the CAD Import Wizard.
- You can import a satellite image of your property as an overlay using the Satellite Picture Import Wizard.
- An Overlay must first be imported before it can be added to your landscape design. Pictures can be imported using the Picture Import Wizard.
- Overlays appear in the Plan and Perspective views as well as during Realtime Walkthroughs. If you want to hide an Overlay during a walkthrough, uncheck the Show in Realtime Walkthrough option.
- When you have finished tracing over your Overlay, you can either delete it or hide it. All Overlays in your landscape design can be hidden at once using the Show/Hide Objects dialog. Another option is to place the Overlay in a hidden layer; see Using Layers for details.