Using Layers
Layers are an organizational feature for grouping objects into categories which can then be hidden or locked as needed.
For example, all plants could be placed into a single layer, which could then be hidden to make it easier to adjust other areas of the design.
Layers can also help you create and present multiple versions of your design ideas. For example, all objects for one proposed landscape layout could be placed in one layer, while an alternate layout could be placed in another. When presenting to your client, you can simply show and hide the appropriate layers.
When using multiple layers, be mindful of which layer is currently selected, because that is the layer that new objects will be added to. For example, if you have a layer selected called Plants, and you add a new Patio object to your design, then the patio will be added to the Plants layer, which is probably not what you intended.
The layer tools are shown below:
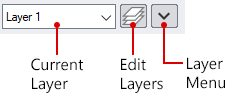
To edit layers, click the Edit Layers button. The following dialog will appear:
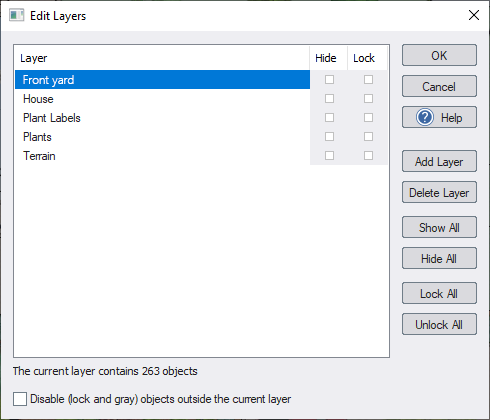
Layer
Displays all of the layers currently in your landscape design. Click on the name of any layer to rename it. Click the Layer header bar to sort by layer name.
Hide
Hides all objects in the layer. Click the Hide header bar to sort by visibility.
Lock
Locks all objects in the layer. Click the Lock header bar to sort by locked state.
Add Layer
Adds a new layer to your design. To rename the new layer, click the layer name and enter the desired name.
Delete Layer
Deletes the currently selected layer.
Show All
Shows all of the layers in your design.
Hide All
Hides all of the layers in your design.
Lock All
Disables selection and modification of objects in all layers.
Unlock All
Enables selection and modification of objects in all layers.
Disable (lock and gray) objects outside the current layer
Enables editing only of those objects that are inside the current layer. All other objects will be locked and shown in gray.
OK
Click to accept your changes.
Cancel
Click to cancel your changes. Important: Any changes will be lost.
To show or hide objects in a layer:
- Click the Current Layer list and select the desired layer.
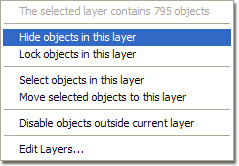
- Click the Layer Menu button.
- Click the Hide objects in this layer option to turn off or on the visibility of the layer.
To lock or unlock objects in a layer:
- Click the Current Layer list and select the desired layer.
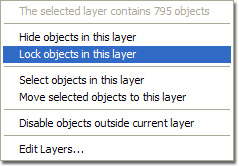
- Click the Layer Menu button.
- Click the Lock objects in this layer option to cause all of the objects within the layer to become selectable or unselectable.
To select the objects in a layer:
- Click the Current Layer list and select the desired layer.
- Click the Layer Menu button.
- Click the Select objects in this layer option.
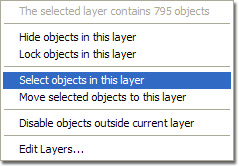
To move objects to the current layer:
- Click the object you want to move to the current layer. To select more than one object, hold the Shift key while clicking on additional objects.
- Click the Layer Menu button.
Click Move selected objects to this layer. Note: If the selected objects are already in the current layer, then this option will be disabled.
To move objects to a layer other than the current one:
- Click the object you want to move to another layer. To select more than one object, hold the Shift key while clicking on additional objects.
- Click Edit , Move to Layer , and click the name of the layer you would like to move the objects to.
To determine which layer an object is in:
- Select the object by clicking it.
- Click Edit and Move to Layer. The object's current layer will have a checkmark next to it.
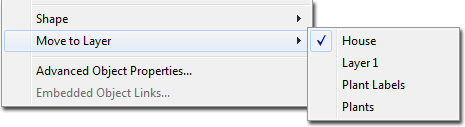
- Press Esc or click anywhere else to cancel the menu.
Note: You can also determine which layer an object is in without selecting it. If the object is currently unselected, then when you move the mouse over the object, the current layer will appear in the help bar at the bottom of the screen.
Tips:
- When adding objects using the Paste or Paste in Place commands, the objects will automatically be added to the layer(s) they originated from. The layers will be created automatically if they do not already exist. If you would rather pasted objects are added to the current layer, enable the user interface setting Paste command moves objects to the current layer. See User Interface Control Settings for details.
- Objects can also be hidden or locked by type instead of by layer. For details, see Showing and Hiding Objects.
- Objects that affect the terrain topology, such as Height Grids, Area Graders, and Contour Lines, will continue to affect the topology even though the objects themselves are not visible.
- Objects that reside in hidden or locked layers cannot be selected, edited, or deleted.