Adding a String Light

The String Light object is a great way to add holiday and party lighting to your landscape design. A variety of bulb shapes and sizes are included, such as LED, c7, c9, icicle, and meteor shower. Lights can be configured to come on automatically at night, and to animate for movies and Realtime Walkthroughs.
To add a string light:
- From the Utilities tab, click Add String Light.
- Draw the string light by clicking the left mouse button to add points. Press the Backspace key to remove the last point added, and press the Esc key to cancel. If you would like to input the distance and angle manually, place at least one point and then click Enter.
- To finish drawing the string light, place the last point on top of the first point. Or, right-click to place the last point.
Setting heights
Most of the time, the lights will need to be raised into position. It is usually easier to add the points on the ground first and then use Edit Points to set their height.
To set the heights:
-
Switch to the Perspective view.
-
Click Edit Points.
-
Select one or more points and raise them into position. You can enter their height manually using the Height property, or drag the green vertical arrow to set their height using the mouse.
-
To adjust the elevation of the entire object, use the Elevation property. This will raise or lower the entire string while maintaining the relative height of each point.
-
When finished, click Edit Points again to exit point editing mode.
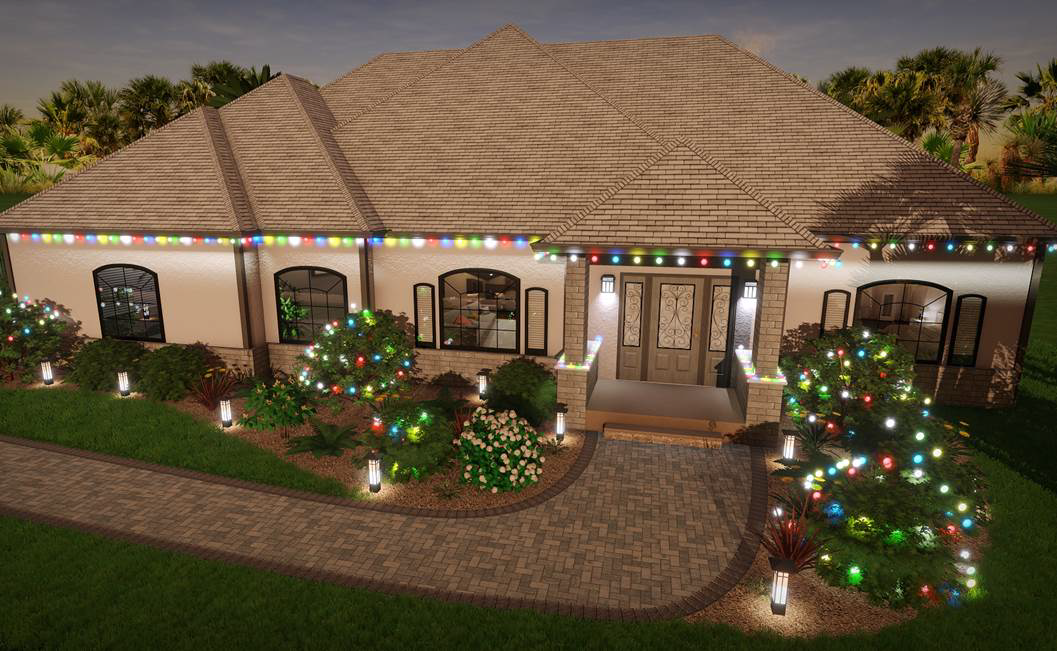
In the following landscape design, string lights were used for the lighting on the gutters and shrubs.