Adding a Sprinkler Line
Applies to:  Plus
Plus  Pro Architect

Realtime Landscaping Pro and Architect include both sprinkler lines and sprinkler heads. In addition, Architect includes the ability to design using symbols in the Plan view.
Because these irrigation tools are versatile, nearly any type of irrigation design is supported, including drip irrigation.
To add a sprinkler line:
- From the Water Features tab , click Add Sprinkler Line.
- Draw the sprinkler line by clicking the left mouse button to add points. Press the Backspace key to remove the last point added, or press the Esc key to cancel. If you would like to input the distance and angle manually, place at least one point and then press Enter.
- To finish drawing the sprinkler line, right-click to place the last point.
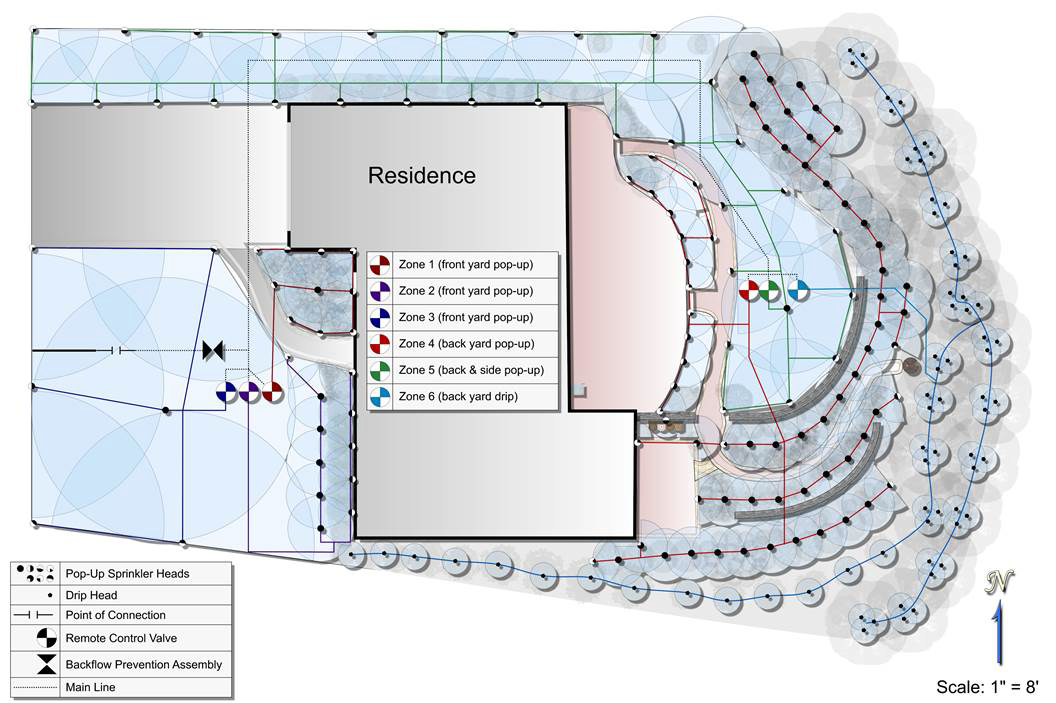
Designing with Irrigation Symbols
Applies to: Plus Pro Architect
Sprinkler lines and heads compose the primary structure of an irrigation system, but there are many symbols that can be used to depict the locations of important objects, such as control valves, the point of connection, and backflow prevention assemblies. For details on adding symbols to the Plan view, see Adding a Symbol.
Tips:
- Sprinkler lines can be curved or straight, depending on the needs of the irrigation system.
- Because sprinkler lines depict underground piping, they do not appear during Realtime Walkthroughs. However, sprinkler heads do appear during walkthroughs and spray water realistically.
- We recommend placing all objects associated with your irrigation design in their own layer. This will allow you to show or hide the entire irrigation system at once. For details on layers, see Using Layers.