Adding a Height Map

The Height Map object is used to sculpt the terrain using an image. Using a height map, you can draw your terrain heights using a paint program such as Photoshop or Gimp. Once your image is imported into Realtime Landscaping, it can be added to your landscape designs where the drawing will be converted into height information.
To create and import a custom height map:
- Open the paint program you would like to use and create a new document.
- Draw the terrain using shades of gray. Brighter shades should be used for areas of the terrain that are raised more, and darker shades should be used for areas raised less. Black may be used where the terrain should not be raised at all.
- Save the image in 24-bit BMP format.
- Import the image as a height map using the Picture Import Wizard.
- When browsing available height maps, your imported image will appear within the Custom category.
To add a height map that you have already imported:
- From the Terrain tab, click Add Height Map.
- Click the picture of the default height map that appears to the right of the screen, and then select the height map you would like to use.
- Click to place the first corner of the height map.
- Click to place the opposite corner of the height map.
How it Works
The brightness of each pixel of the height map drawing determines how much the terrain should be raised or lowered. Areas of the drawing that are black will remain flat, while areas that are white will match the height map's Height property.
For example, if the height property of the height map is set to 10 feet (3.08 m), then wherever the height map is white, the terrain will rise 10 feet (3.08 m). Where the map is gray, the terrain will rise 5 feet (1.52 m). The height property can also be set to negative values in order to lower the terrain.
Surrounding your height map image with a black border will help prevent edge seams. For an example, see the sample height map below.
When using detailed height maps, you might need to increase the terrain resolution to High for more accuracy. For details, see Terrain Settings.
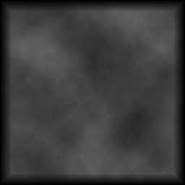
The picture below is a sample height map included with Realtime Landscaping.
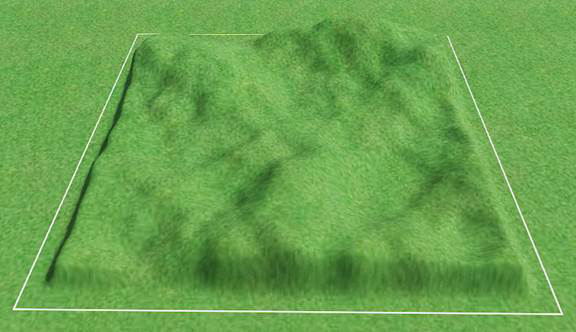
The empty landscape design in the picture below uses the height map shown above to form its topology.
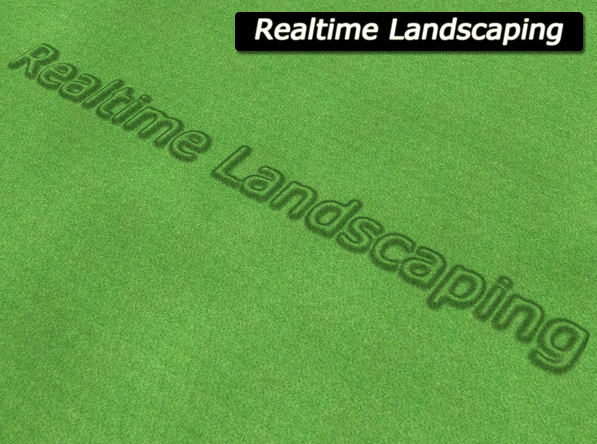
In the picture below, the name of our landscape design software was imported as a height map.
Tips:
- Height maps can be any size needed.
- Multiple height maps can be used in a single design.
- Adding a black border to the height map image can improve results by eliminating potential edge seams.
- When working with complex height maps such as in the picture shown above, we recommend increasing the terrain resolution. See Terrain Settings for more information.
- If a height map overlaps other terrain sculpting objects, it may be necessary to modify the Terrain Sculpting Order.