Using Automatic Dimensions
To help you create shapes with accurate sizes, the Auto Dimensions option is enabled by default. These show the length of the curve between control points whenever you add or edit the points of an object.
To toggle Auto Dimensions on or off
- From the Settings menu, select Show Auto Dimensions. Then click Enable Auto Dimensions and click OK.
- Or press Ctrl+D.
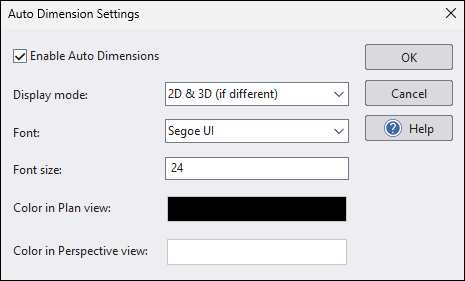
Display mode
Automatic Dimensions offers three display modes, each calculating and presenting measurements differently based on the underlying surface:
- 2D (top-down projection): Calculates length assuming a flat 2D surface. Ideal for designs where elevation changes are not significant.
- 3D (true length): Calculates length based on elevation changes in the underlying surface. This provides more accurate measurements for designs with significant topography.
- Both (2D & 3D if different): Always displays the 2D length. If the 3D length differs, it's shown as well, followed by "(3D)".
Important: This option does not impact the lengths shown in an object's Information property or the lengths listed in the Project Material List. Those measurements are always based on the true 3D length unless specified otherwise.
Font
Font used to display auto dimensions.
Font Size
Size of the font used to display auto dimensions.
Color in Plan view
Color used for displaying auto dimensions in the Plan view.
Color in Perspective view
Color used for displaying auto dimensions in the Perspective view.
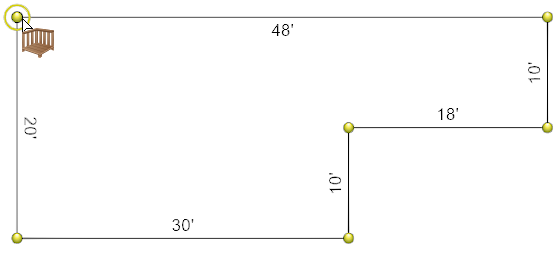
Example
The example below shows the dimensions that appear when adding a deck.
Tips:
- When Automatic Dimensions are enabled, they will only appear while editing points. If you want to add persistent dimensions to your design, see Adding a 3D Dimension and Adding a Lot Boundary. In Architect, also see Adding a Linear Dimension.