Adding a Lathe

The Lathe object is a useful tool that creates a 3D model by revolving a shape. Lathes are used for creating many different types of intricate shapes, such as those found in drinking glasses, artistic finials, and round columns.
To add a Lathe:
- From the Modeling tab, click Add Lathe.
- Draw the outline of the lathe by clicking the left mouse button to add points. Press the Backspace key to remove the last point added, and press the Esc key to cancel. If you would like to input the distance and angle manually, place at least one point and then press Enter.
- To finish drawing the lathe, place the last point on top of the first point. Or right-click to place the last point.
Lathes are created flat on the ground. To rotate the lathe to another orientation, first convert it to a Custom Model and then set the desired rotation angles. It is a good idea to save a copy first since you will no longer be able to edit the underlying shape once you convert it to a custom model.
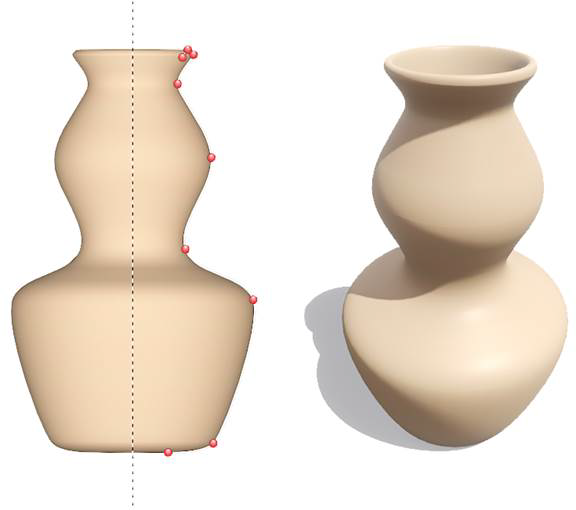
The picture on the left shows the lathe in the Plan view, along with the points that define the shape. The dashed line is the center about which the shape is rotated. The picture on the right is the completed object. It was converted to a Custom Model and rotated upright by setting the X angle to 90.
Tips:
- The shape of a lathe can be edited after it is created by clicking the Edit Points button. See Editing Points for details.
- When you are finished creating the object and don't plan to make any more changes to its shape, you can convert it to a Custom Model for more control over its size and orientation. However, once you do this, you will no longer be able to edit the underlying shape, so we recommend saving a copy first.