Sky and Time of Day Settings
These settings determine the appearance of the sky, moon, and the current time of day.
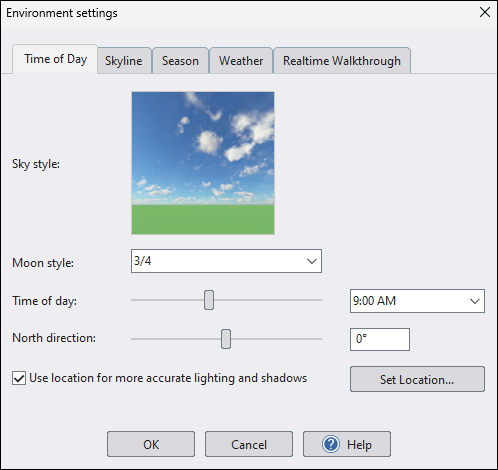
Sky style
Click the picture of the sky to choose a new style.
Each sky style includes multiple sky textures for daytime, sunrise, and sunset conditions. The software automatically selects the matching variation based on the current Time of day. Nighttime uses a generic night sky.
Sky styles are also rotated automatically to match the North direction, so the sun in the sky lines up with the software's sun direction.
Moon style
Select the style of moon you would like to see during a Realtime Walkthrough at night. To disable the moon, set the style to None.
Time of day
Select the desired time of day you would like to see in the Perspective view.
North direction
The north direction determines the position of the sun, which affects the angle of shadows in the Perspective view. The north direction also determines the relative directions of survey bearings when using the Lot Boundary object.
Sky Style vs HDR Sky
Applies to:  Plus
Plus  Pro Architect
Use Sky style when you want the software to handle sky variation and sun alignment automatically.
Use HDR Sky when you want a specific sky image. HDR skies are not tied to time of day and are not rotated automatically using north direction, so you will need to align them manually.
Use location for more accurate lighting and shadows
This feature calculates the sun's position using your specific location, date, and time of day (set above). Shadows and lighting are then rendered more accurately, improving the realism of your renderings and presentations.
When this feature is enabled, the following dialog will appear:

Location
Current location of your project. To set the location, click Set Location and enter the location. There are several ways you can specify the location, such as street address, city, state, zip code, landmark, etc.
Note: If the software cannot find your location, then select a nearby location instead. This information is only used to calculate the Sun's position, so an exact address is not required.
Latitude, Longitude
These coordinates specify the location of your project on Earth. They are automatically set when using the Set Location option but can also be manually entered if needed.
Enter these values in decimal degrees. If your coordinates are in DMS (degrees, minutes, seconds) format, you can convert them to decimal degrees using an online conversion tool.
Use the following guidelines for entering coordinates:
- Latitude: Positive for north, negative for south.
- Longitude: Positive for east, negative for west.
For example, Seattle Washington's coordinates are approximately 47.6038° N, 122.3301° W. These would be entered as 47.6038 and -122.3301.
Date
Date to use when calculating the position of the sun.
Time zone
Select the time zone for the specified location.
Daylight savings
Check this option if daylight savings is currently in effect for the above date.