Weather Settings
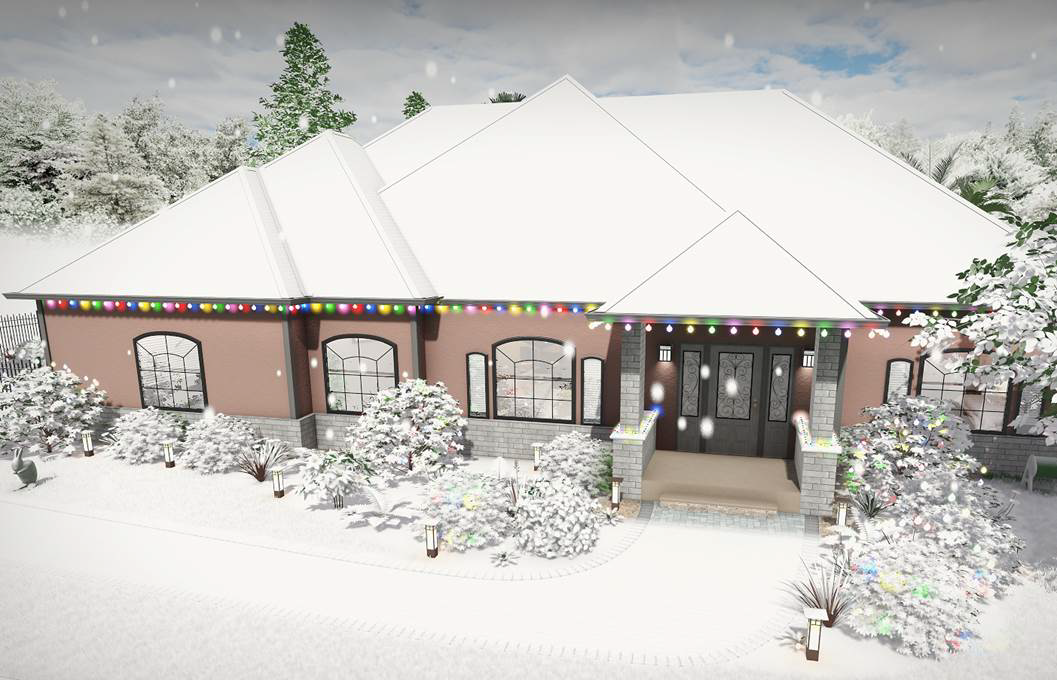
Create a winter version of your landscape design with just a few clicks. This is a great way to visualize your winter holiday lighting designs.
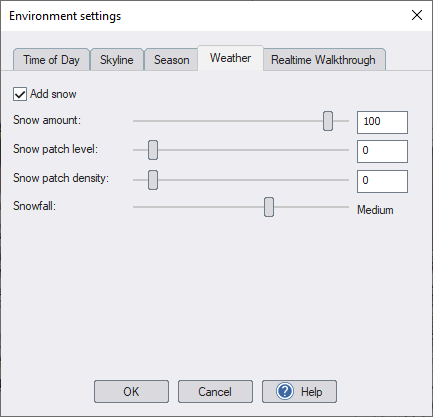
Add snow
Add snow to your design.
Snow amount
Determines the opacity of the snow. Use a smaller number for light snow, or a larger number for heavier snow.
Snow patch level
Determines how much the snow has melted. Use 0 for solid snow, or a larger number for patchy snow that is partially melted.
Snow patch density
When the snow is patchy, this determines how close or far apart the snow patches are.
Snowfall
Determines how much snow is falling, if any.
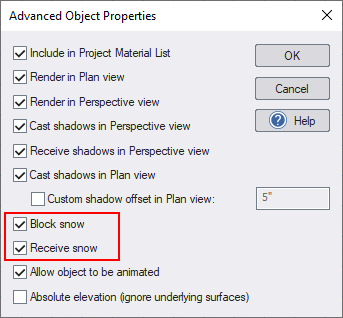
Controlling which objects block and receive snow
You can prevent snow from accumulating on certain objects, such as pool coping, moving vehicles, and heated patios. You can also control if an object blocks snow from falling on objects underneath it.
To control if an object blocks and/or receives snow:
-
Select the object.
-
From the Edit menu, click Advanced Object Properties. Or press J.
-
Check Block snow to prevent snow from falling on objects underneath the selected object. Uncheck this option to allow snow to fall through the object.
-
Check Receive snow to allow snow to accumulate on the selected object. Uncheck this option to prevent snow from accumulating on the object.
Tips:
-
Each skyline includes two versions, normal and winter. When snow is enabled, the winter version will be used automatically.
-
Sky31 (used in the above scene) is an overcast sky, which works well with snow. See Sky and Time of Day Settings for details on how to change the sky.