Adding a Picture

Pictures are high-resolution photographs of objects you can use to decorate your landscape designs. The backgrounds have been professionally removed so they can be used with any design. Many different types of objects are included, such as planters, rockery, birdbaths, statuary, and much more.
To add a picture:
- Click Add Picture.
- Select the desired picture by clicking the picture in the property window.
- Click to add the picture. Hold Ctrl while you click to add more than one.
- Rotate and scale the picture as needed for your landscape.
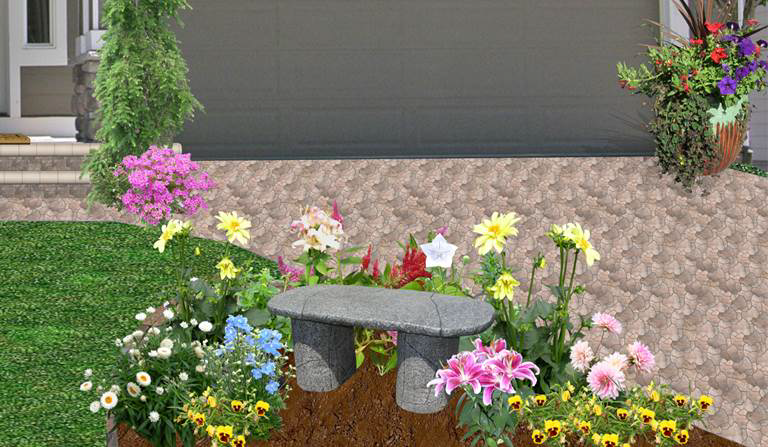
The Picture object was used for the bench in the following landscape design.
Editing Points
The picture's shape and size are determined by four points. You can freely edit these points to change the shape and size as desired. This can be used, for example, to modify the picture to better match the perspective of the background.
To edit the points:
- Click Edit Points.
- Select the point(s) you want to change. Click a point to select it and deselect other points. Press and hold Shift while clicking to select multiple points. You can also draw a box around the points you want to select.
- Click and drag any of the selected points to move them. You can also click and drag on the line between two points to move that edge.
- When done, click Edit Points again to leave point-editing mode.
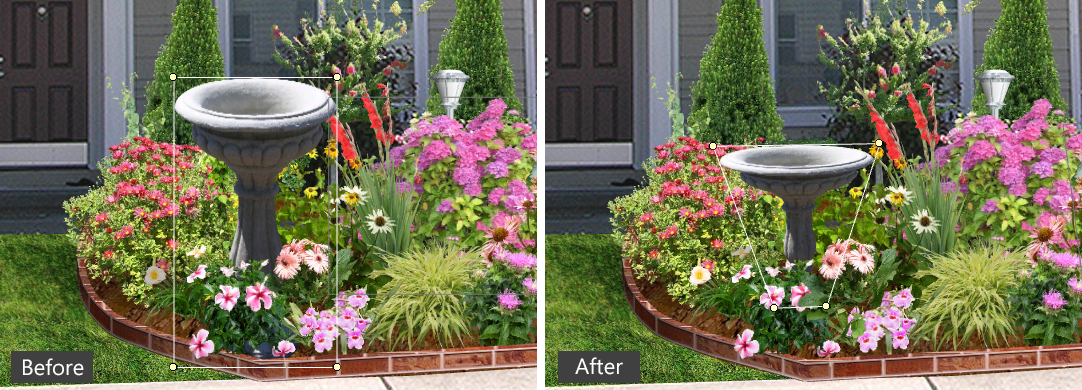
In the following landscape design, a birdbath was added to the garden area. The points were then adjusted to alter the shape and widen the top.
Controlling the Render Order
When working with overlapping objects, you can control which ones are rendered first. For example, you can use this to ensure your pictures appear on top of the lawn. See Controlling the Render Order for details.
Tips:
- See Scaling Objects and Rotating Objects for details on how to scale and rotate objects.
- You can change the color and brightness of your pictures, and even create new ones. See Editing Color and Brightness and Editing using the Realtime Picture Editor for details.