Adding a Landscape Light

Well-placed lighting can dramatically improve the appearance of your landscape during low light conditions. When viewing your landscape design at night, Realtime Landscaping Photo will automatically turn on your lights.
Realtime Landscaping Photo includes a wide variety of landscape lights such as traditional garden lights, spotlights, and Japanese lanterns.
To add a landscape light:
- Click Add Light.
- Select the desired light by clicking the picture in the property window.
- Click to add the light. Hold Ctrl while you click to add more than one.
- Using the property controls, adjust the light's size, rotation angles, and perspective to match your landscape design.
Viewing your Landscape at Night

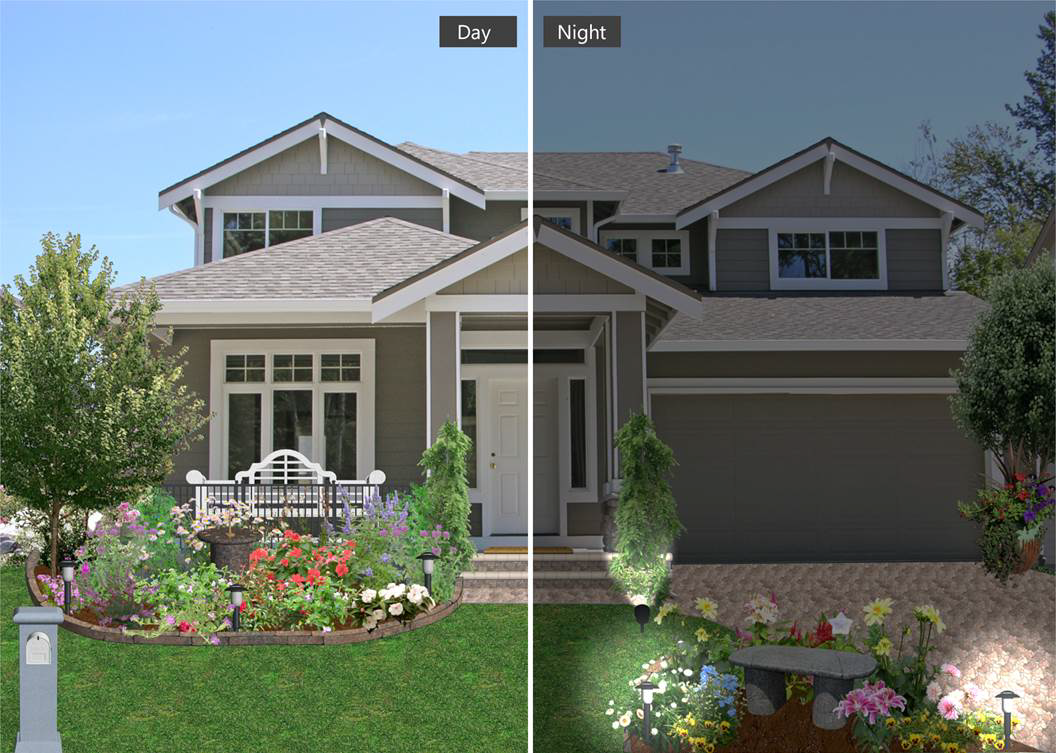
You can switch between day and night viewing of your landscape design by clicking the Night button. You can control how light or dark your landscape is at night, the direction of the sun/moon, and whether objects cast shadows. You can also specify the ambient color, so you can simulate beautiful sunrises and sunsets. See Environment Settings for details.
The following example shows a landscape design with both day and night settings.
Tips:
- You can use any color lights you desire using the Color property.
- The intensity of the light is a combination of the brightness of the color you select and the light's Brightness property. Therefore it is best to use a bright color (such as pure white) for the color, and then set the desired brightness.
- You can hide the fixture by unchecking the Show fixture option. This is useful when your background picture already contains lights.