Controlling the Render Order
When working with overlapping plants, fill regions, and other objects, you can control which ones are rendered first. For example, you can use this to ensure your plants appear on top of the lawn.
To change an object's render order:
- Select the object you want to change.
- If you want the object to render on top of all other objects, from the Edit menu click Bring to Front or press Ctrl+F. Or, if you want the object to render beneath all other objects, from the Edit menu, click Send to Back or press Ctrl+B.
If you want to bring the object one more step towards the top of a group of overlapping objects, from the Edit menu, click Bring Forward or press F. Or if you want to bring the object one more step towards the bottom of a group of objects, from the Edit menu, click Send Backward or press B.
Note: You can change multiple objects with this command. That is, selecting multiple objects and using Bring to Front will cause the selected objects to render in front of the unselected objects.
In the following example, the Region object was used to add a new driveway. Notice how the region is incorrectly rendering on top of the plants. This is easily fixed by selecting the driveway and using the Send to Back command, as shown below.
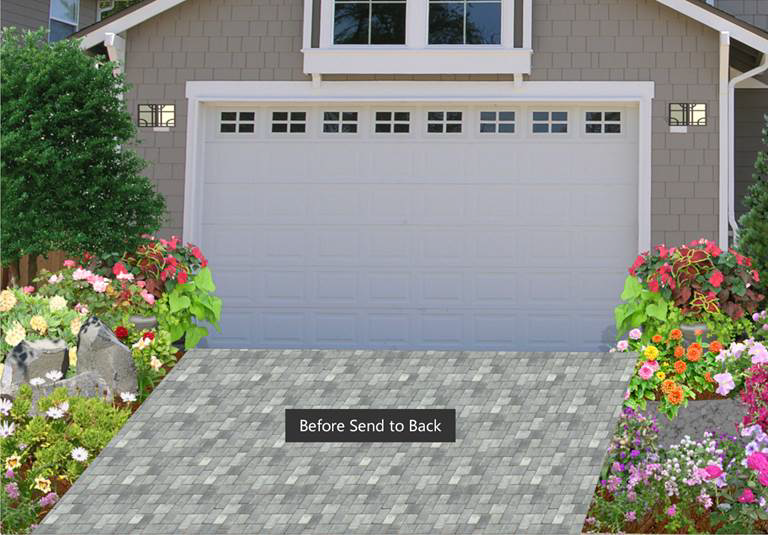
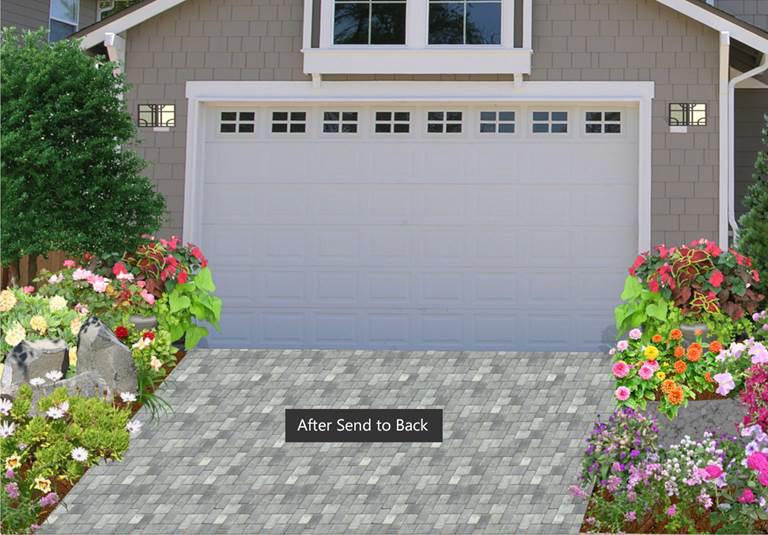
Of course, you could also select all of the plants and choose Bring to Front , but in this case, it was easier to just change the driveway.