Adding an Accessory

Realtime Landscaping Photo includes many types of accessories that you can use when designing your landscape, including arbors, greenhouses, planters, outdoor kitchens, and much more.
Accessories are 3D models, not pictures. While pictures of real objects are very realistic, they are somewhat limited because they do not always match the viewpoint or perspective of your background picture. With the extensive library of 3D models in Realtime Landscaping Photo, you can rotate, scale, and change their perspective as needed to seamlessly blend into your landscape design.
To add an accessory:
- Click Add Accessory.
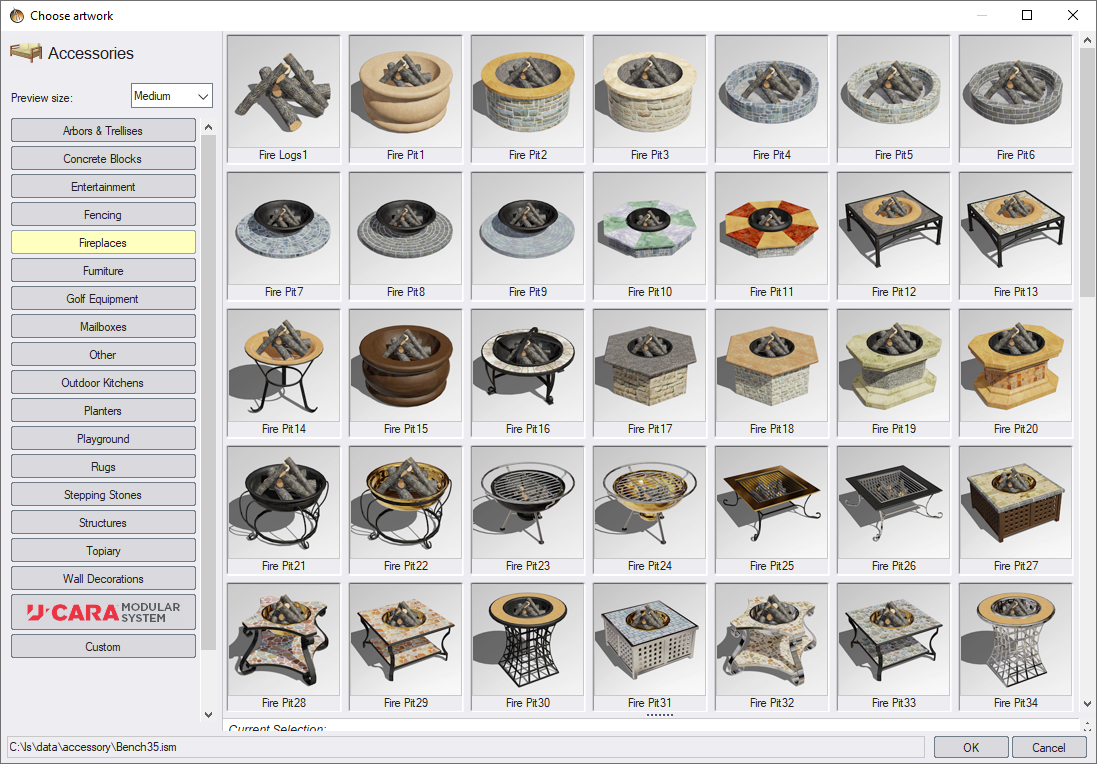
- Select the desired accessory by clicking the picture in the property window.
- Click to add the accessory.
- Using the property controls, adjust the accessory's size, rotation angles, and perspective to match your landscape design.
Changing the Size and Angle
You can change the size and angle of accessories to help them match your background picture. For example, suppose you want to add a pond bridge to your design. When you first add the bridge, it will appear with the side facing you. Using the Rotate about X and Rotate about Y properties, you can rotate the bridge into the desired position.
To adjust the size
- Select the accessory (or accessories) you want to change.
- Set the size as desired using the Width , Depth , and Height properties. If you want to change the size in only one or two dimensions, uncheck the Scale evenly option before making your change.
To adjust the angle
- Select the accessory (or accessories) you want to change.
- Use the Rotate about X property to rotate the accessory toward or away from you. Use the Rotate about Y property to rotate the accessory about its vertical axis. (You can also drag the green dot above the accessory to rotate about the vertical axis.)
Changing the Perspective
In most cases, changing the size and angle are all that are required to match the accessory to your landscape design. However, depending on the size of the accessory and its placement in the landscape design, you may also want to adjust the perspective for a closer match.
To adjust the perspective
- Select the accessory (or accessories) you want to change.
- Use the Perspective property to adjust the simulated vanishing point. Use the Offset X property to make the accessory appear as if it was viewed from the left or right. Use the Offset Y property to make the accessory appear as if it was viewed from above or below.
Editing Materials
You can edit the materials of accessories for more variety. For example, suppose you like one of the planters that we have provided, but want to use a different color of wood. This is easily done using the Edit Materials command.
To edit materials:
- Select the accessory you want to modify.
- Click the options button to the right of the accessory's picture. When the drop-down menu appears, select Edit materials. The Edit Materials dialog will appear, allowing you to change the color, brightness, and texture of each of the accessory's materials. See Editing Materials for details.
Controlling the Render Order
When working with overlapping objects, you can control which ones are rendered first. For example, you can use this to ensure your accessories appear on top of the lawn. See Controlling the Render Order for details.
Tips:
- When you want multiple copies of the same accessory, set the size and angle of the first one and then use the Copy and Paste commands for the copies. This is much easier than setting the size and rotation angle of each one individually. See Cut, Copy, & Paste for details.
- You can customize the materials in the accessory. See Editing Materials for details.
- See Model Import Wizard for details on how to import SketchUp and other models for use in your landscape designs.