This guide will show you how to add a plant to your landscape design in Realtime Landscaping Pro.
To get started, click the Landscape tab and click the Plant button.
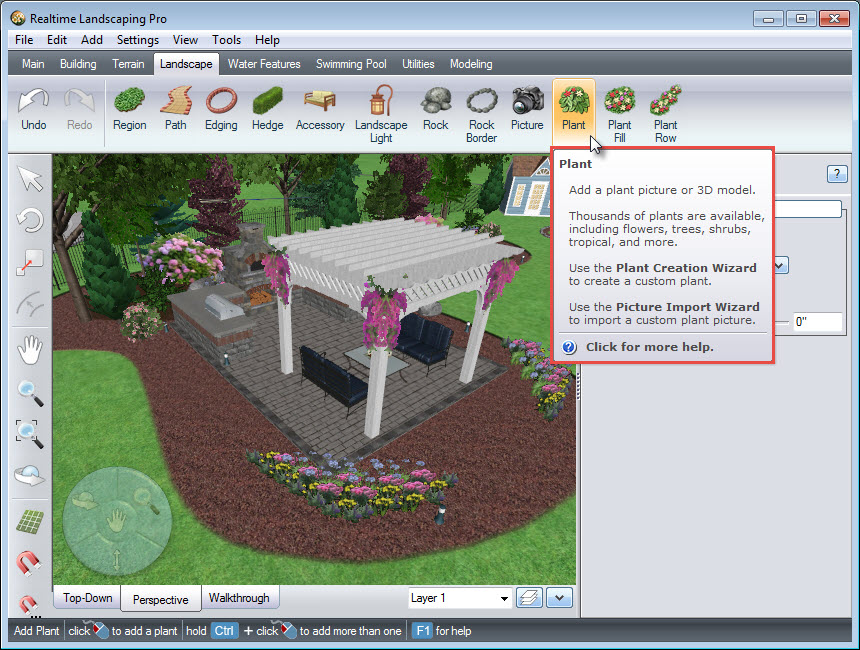
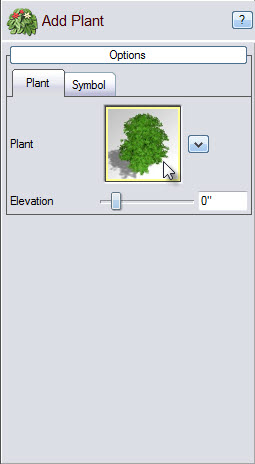
To select a plant, click the plant image seen below and it will take you to a large selection of plants.
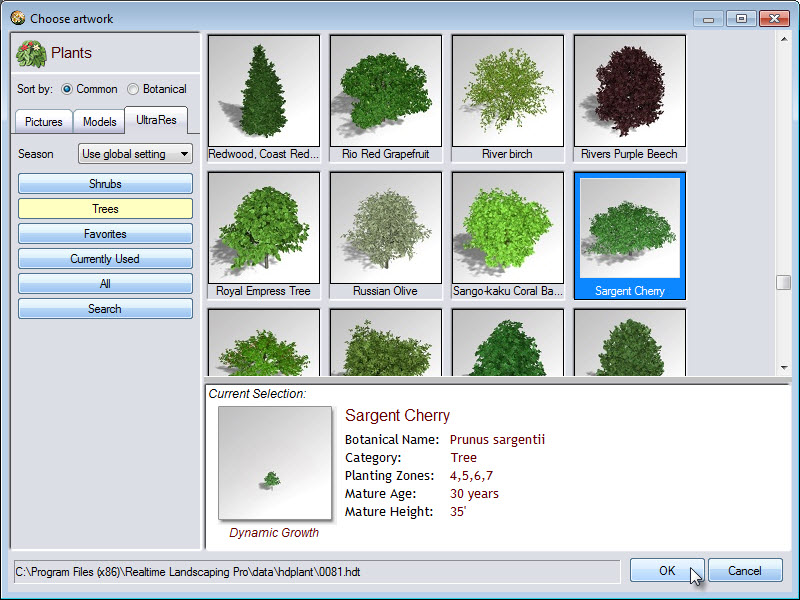
There are three different types of plants you can add to your design. Pictures are high resolution photos of actual plants. Models are hand-crafted 3D models of real plants. UltraRes plant models realistically grow with age, actually sprouting new branches and foliage, change appearance according to the season, and are highly detailed. Make your selection and click OK.
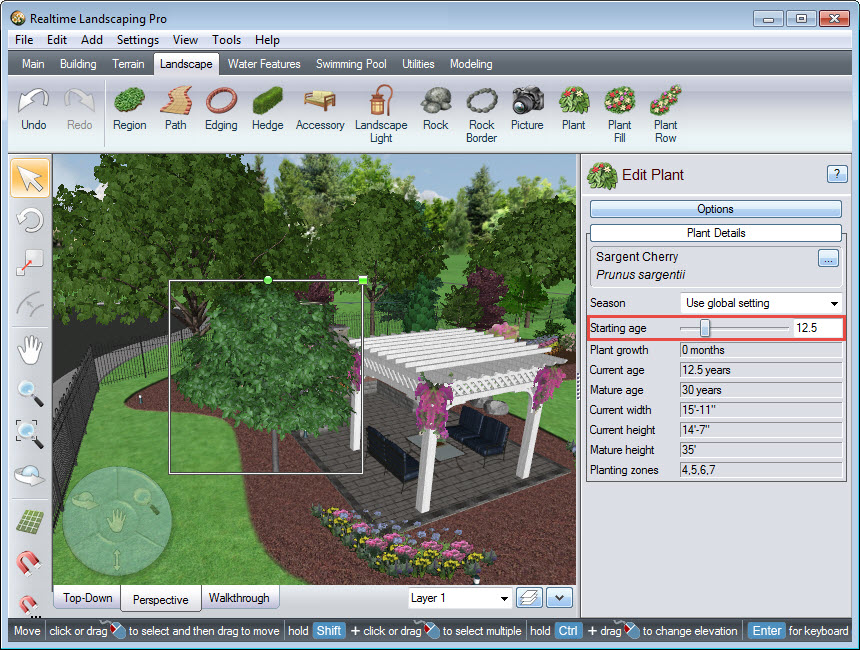
Left click to place the plant in the desired position. Note that the selected plant will have a white line outline, with a small green square at the upper right corner and a small green circle to the left of it. To adjust your plant’s size, Left click and drag above the green square, or manually enter the age into the space provided. The plant size will adjust accordingly. To rotate the plant, Left click and drag above the green circle so that it faces the desired direction.
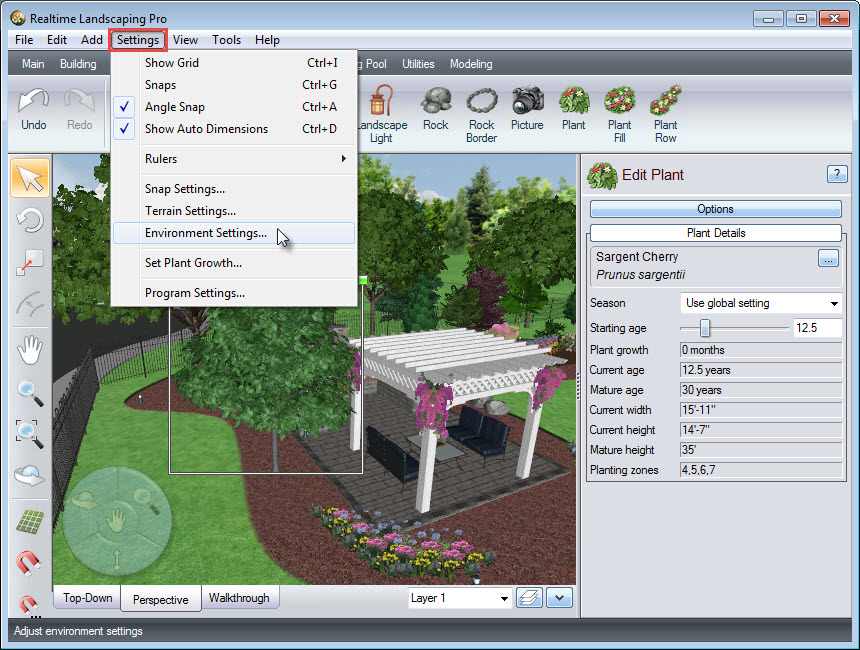
UltraRes Plants® can vary their appearance based on the season. First, click Settings found in the Menu Bar, then click Environment Settings.
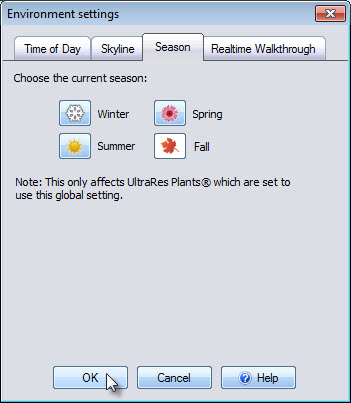
A new dialog box will appear. Click the Season tab, select the desired season and click OK.
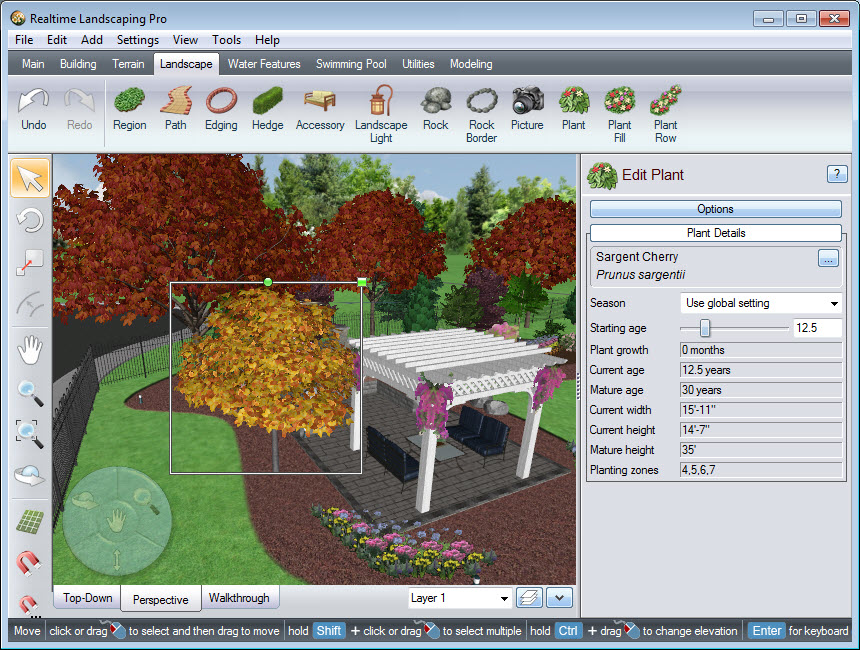
Any UltraRes Plants® in your landscape will automatically change it’s appearance to match the chosen season. Here we can see what the plant will look like during the fall season.
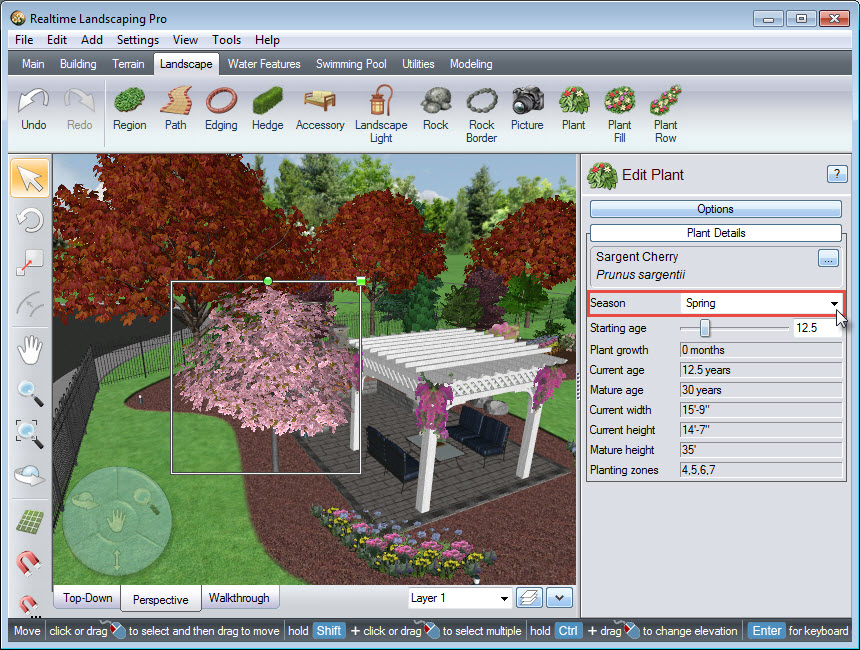
If you would like a specific plant to stay in a different season, select the plant, then choose a season from the following drop-down option:
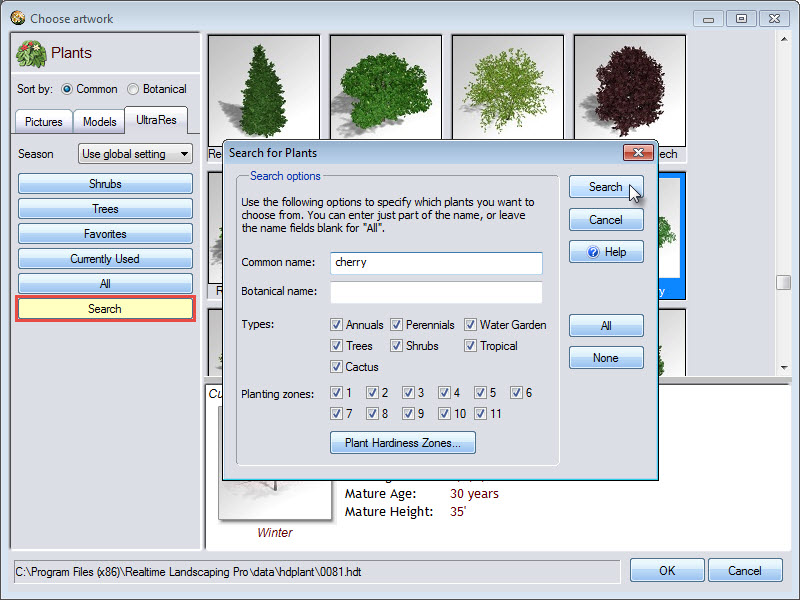
To search for a specific plant, click the plant image again. Click Search and a dialog box will appear. You can search by common name, botanical name, type, and/or by planting zone. When you are done, click Search. Your search results will appear for each different plant type.
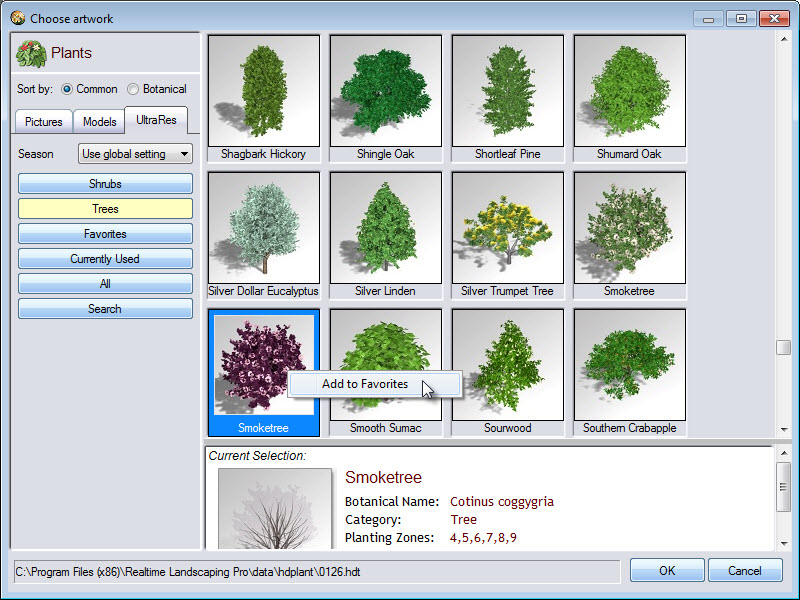
If there are certain plants you use often, you can Right click on the plant image and click Add to Favorites. Next, select Favorites. Your newly added favorite will remain in this section until you remove it, even after you switch designs.
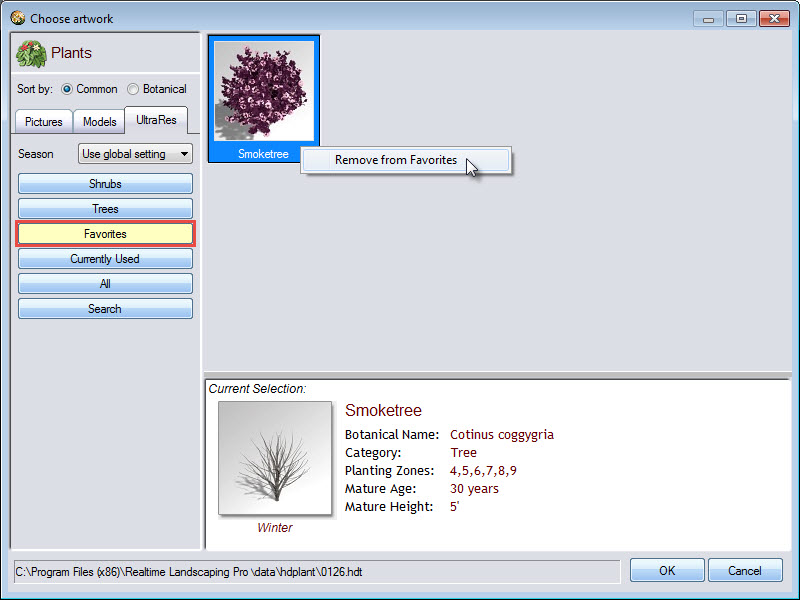
To remove a plant from Favorites, Right click on it and select Remove from Favorites.
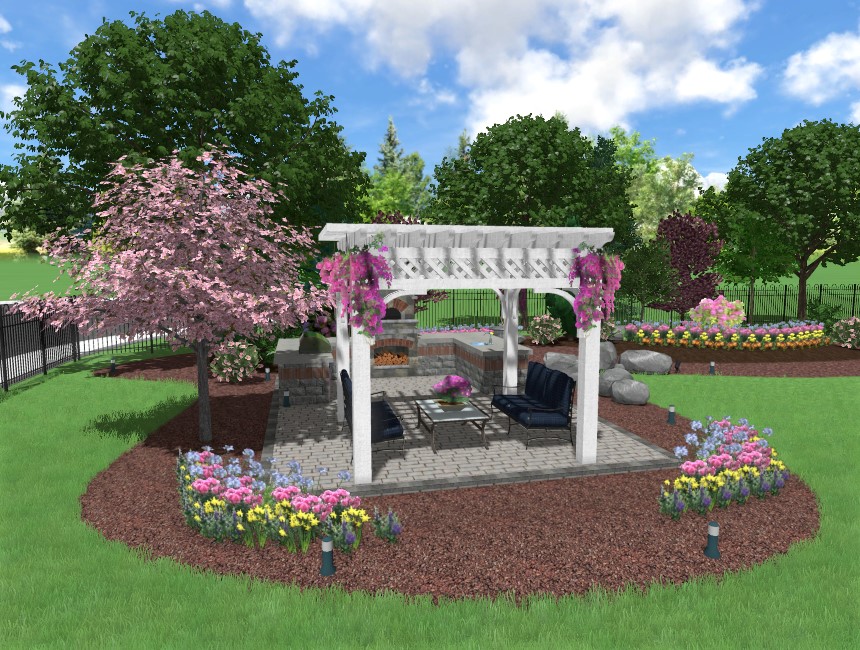
You have now completed adding a plant to your landscape design.
Thank you for reading this guide, and please feel free to contact us for more information about our software.