Printing your Landscape Design
Use the Print command to print your landscape design to any graphics printer supported by Windows.
To print your landscape design:
- From the File menu, click Print. The following dialog will appear.
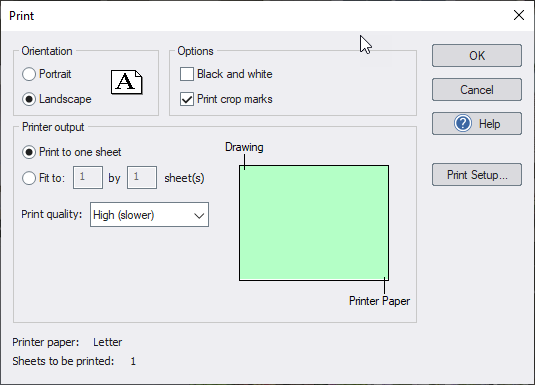
Orientation
Use the Portrait and Landscape options to select the orientation on paper.
Black and white
Use this option if you want to print in black and white.
Print crop marks
Crop marks are added automatically when the landscape design spans multiple sheets. You can turn these off if desired.
Print to one sheet
Use this option if you want to automatically scale the landscape design to fit to one sheet of paper.
Fit to x by y sheets
Use this option if you want your landscape design scaled to fit the specified number of sheets of paper.
Print quality
Use this option to determine the output quality level. Low-quality printouts are faster, but high quality is crisper and more detailed.
Print preview
This shows you how many sheets of paper will be required based on your current settings. The green shaded area represents your landscape design; white represents the portion of the printer paper that will remain blank. Select the desired options and click OK. 2. Select the desired printer and the number of copies. Then click OK.
Printing to Multiple Sheets
When printing to multiple sheets (using the fit to option), be sure the print crop marks option is selected. This will cause small black lines to print at the edge of each sheet. These show you which edges to trim in order to join the sheets together.